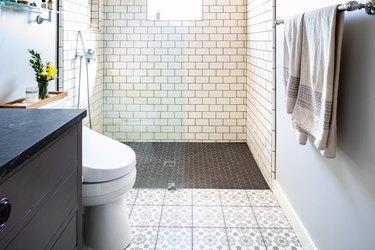
A full bathroom tile remodel is one of those home projects that everyone dreads, so you're not the only one looking for ways to update bathroom tile without replacing it. A few simple methods might be enough to refresh your ceramic tile or porcelain tile so you can put off a full remodel for a few more years.
There are a lot of reasons you might prefer to update bathroom tile without replacing it, but hassle and cost are definitely the top two. Pulling out the old tile and installing new tile takes your bathroom out of commission for days or weeks. On the other hand, paying for professional tile installation is a major remodeling expense, even in a small bathroom of 40 or 50 square feet. On top of the demolition cost (which may be more than $1,000), installation costs often range from $10 to $15 per square foot but could cost as much as $25 per square foot.
Video of the Day
Video of the Day
Luckily, there are a variety of DIY projects you can take on to update bathroom tile without replacing it. From old-fashioned elbow grease to new-fangled tile stickers, here are four ways to give existing tiles a new look without paying for a full bathroom remodel.
1. Deep Clean the Tile

Estimated project cost: $0 to $20, depending on what you already own
Never underestimate the power of a really thorough cleaning. It might not make your bathroom look brand new, but scrubbing the tile and grout might reveal dramatically brighter surfaces. Years of soap scum and other buildup can dull and darken the appearance of the tile and grout beneath. Always start your DIY bathroom tile remodel with a deep cleaning even if you plan to cover the tile with paint or decals.
Start with a spray soap-scum remover to remove old soap residue from shower and tub walls. To deep-clean tile grout and restore its original color, use an alkaline cleaner like Spic and Span or Mr. Clean. Avoid bleach or acidic cleaners, including vinegar, as these wear away at grout and can damage some tile materials, including natural stone. Scrub tiles and grout with a nylon scrub brush, and rinse well as you work.
For an even more dramatic transformation, you might opt to have the tile and grout professionally steam-cleaned. This costs about $400 for a standard-size bathroom and can be done in a matter of hours.
Warning
Check product labels to make sure cleaning agents are safe for type of tile you have. Natural stone and unglazed ceramic tile are particularly vulnerable to damage from harsh or acidic cleaners.
2. Regrout the Tile

Estimated project cost: $50 to $100
How often you'll need to regrout a bathroom floor, tiled bathroom wall, shower wall, and other bathroom tile depends on a few factors. But if grout is badly stained or is cracked or noticeably worn away, cutting it out from between your tiles and applying fresh grout might be worth the effort. This DIY project is doable even for homeowners with minimal home improvement skills, though it does require patience.
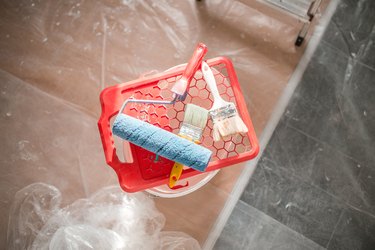
- Start by prepping the area where you plan to work. If you're regrouting shower walls over a bathtub, lay down a drop cloth to protect the shower floor and use painter's tape to keep it in place around the edge of the tub.
- Wearing eye protection, use a manual grout removal tool to scrape the old grout out from between tiles. Alternatively, you can attach a special oscillating grout removal blade to an electric multitool. These blades are typically made with carbide tips. Using this kind of tool should make grout removal go much faster than using a manual tool, but it's also riskier because tiles can be damaged if the blade slips.
- Vacuum up all dust and debris with a shop vac. Clean the tile to prepare it for new grout.
- Prepare the new grout. You may buy grout powder that has to be mixed with water in a bucket or skip a few steps by using premixed grout, which is available in a few colors. Make sure to choose water-resistant grout for showers and other bathroom surfaces. Also, measure the joints before choosing grout. Unsanded grout is generally used for joints narrower than 1/8 inch, while sanded grout is appropriate for wider joints.
- Use a paint stirrer or trowel to scoop some grout onto a grout float. Working in one section at a time, drag the float along the tile to push as much grout into the joints as you can. When the joint is packed with grout, tilt the float and use the edge to scrape any excess grout off the tile.
- Let the grout set as directed; the waiting time may range from a few minutes to more than 10. Dampen a grout sponge with clean water, and wipe the diagonally across the grout joints to remove excess grout. Rinse the sponge frequently, and wring it out well so as not to add too much water to the grout.
- Let the grout harden as directed, then use a soft cloth to buff away any dried grout haze from the tile.
- Let the grout fully cure as directed, then apply grout sealer to help prevent stains. Some grout sealers should be applied by a brush, but there are also spray grout sealers that are even easier to use. Whichever one you choose, follow package directions carefully and make sure the bathroom is well ventilated while you work.
This same process can be used to regrout floors, walls, and other tiled surfaces. It may be useful to watch a few tutorials from home improvement professionals before you get started so you know exactly what you should be doing. While regrouting a shower or other wet area, be sure to replace the caulk along all joints where the tile meets another surface as well as around the showerhead and faucet. Caulk is critical to keeping water from getting behind the tile, where it can lead to mold growth and other problems.
Tip
If you’re thinking about a full bathroom tile remodel because of just a few unsightly tiles, consider replacing damaged ceramic tile instead. Pulling out a few cracked or chipped tiles is much easier than replacing all the tile.
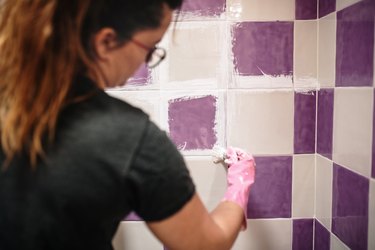
3. Paint the Tile
Estimated project cost: $50 to $100
Painting tile is a quick way to make a big impact in your bathroom design. The best option here is to use a paint specifically designed for tile. It's important that the paint bonds to the slick tile surface as well as the grout and that the final finish is durable enough for foot traffic and water contact.
For shower and tub walls, you can use an epoxy paint system like Rust O-leum Tub & Tile Refinishing Kit. This requires cleaning and sanding the tile before you brush or roll on the paint. For tile floors, Rust O-leum Home Floor Coating Kit is a equally DIY-friendly option. This product requires no sanding and includes a colored base coat and a clear protective topcoat. Both coats are applied with a roller.
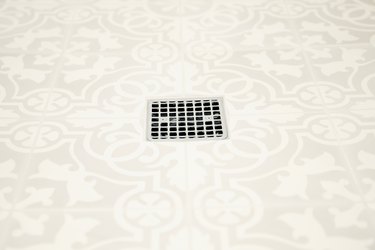
4. Decorate Tiles With Decals
Estimated project cost: $2.50 to $5 per square foot
Of all the DIY bathroom makeover methods available to you, using peel-and-stick tile decals is probably the easiest. They're available in individual squares, in strips, and in rolls like wallpaper. Depending on your interior design preferences and the shape/size of your tiles, there are a lot of styles available that could work for your bathroom. Cover just a few wall tiles to create some visual interest or create an entirely new bathroom by covering the entire wall with colorful decals.
Decals may be applied to tile throughout the bathroom, even inside a shower, as long as you choose the right decal for the right job. Make sure to choose waterproof decals if you hope to transform your shower or bathroom floor, for example, and make sure you're choosing decals that are designed to be removable. A caveat is that this tile makeover strategy works best when you're covering square ceramic tile. If you have hexagon or subway tile in your bathroom, you'll have limited options for decals that match their shape.
As for the application process, it should be about as simple as applying a sticker. Again, it's key that you start with clean tile. Remember that if you don't like the way they look, you can always peel them off and start over! That's the beauty of a DIY bathroom tile makeover: nothing's permanent.