Mold is a common problem with firewood. Conditions outdoors are often damp, and firewood is full of the nutrients that mold needs to thrive. But mold is not an inevitability. In fact, it is seen most often in firewood that is improperly stored or cured. The best way to get rid of mold on your firewood is to stack and store it properly. If left in a spot with access to direct sunlight and drying winds for at least six months, your firewood will have ample time to dry out and will be far less likely to develop mold. Any existing mold dries up and dies once the firewood is kept sufficiently dry.
Step 1
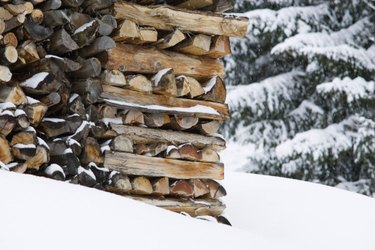
Choose a spot for your firewood pile that has access to as much direct sunlight and wind as possible (never in the shade of a structure). Dry, warm places are much less susceptible to mold growth.
Video of the Day
Step 2
Create a base for your firewood pile. Even properly stacked and piled firewood has a hard time drying out and resisting mold growth when in direct contact with moist ground. Wood pallets make an ideal base layer as air circulates well underneath them.
Step 3
Stack your firewood as soon as possible after it is cut, before the mold has a chance to grow.
Step 4
Stack the wood in a single row that is just one log thick. If you do not have enough space to create a long row, or your pile is getting too high, you can create parallel rows. To ensure that both piles have equal access to sunlight and wind, they must be at least 4 feet apart.
Step 5
Leave the wood to dry for at least six months before burning it. This is about the time that most wood in most areas needs to dry out sufficiently enough to burn well and resist mold growth. However, piles made of dense woods like oak, and piles stacked in damp climates, may take as long as 1 year to dry out sufficiently.
Step 6
Dry out firewood that has already developed mold growth away from the untainted wood in the pile. Once the wood dries out, any surface mold will die and can be brushed off with a stiff-bristled brush (wear a dust mask). Do not burn moldy wood. It spreads mold spores throughout your house.
Video of the Day