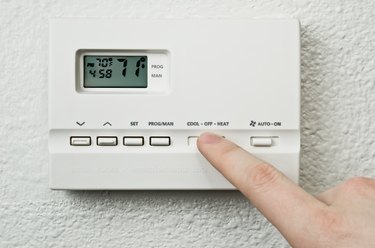
A thermostat is to your HVAC system what a light switch is to your room lights, with the exception that the thermostat is automatic so you don't have to remember to switch on the furnace or air conditioning system manually. Since the thermostat is basically a switch, you can bypass it using a thermostat jumper wire. As long as it isn't broken, the component of your HVAC system that you're testing will come on when you do this. If that component has been malfunctioning, this procedure will tell you whether or not the thermostat is responsible.
Depending on the complexity of your heating/cooling system, the thermostat could have anywhere from two to eight wires of different colors. The most important one is the red wire (R-wire) that carries 24-volt power from the system transformer. If you jump the R-wire to any other terminal and the system component associated with that terminal switches on when it previously wasn't working, you have a bad thermostat.
Video of the Day
How to Use a Thermostat Jumper Wire
The most efficient way to jump test a thermostat is to use a thermostat jumper wire. You can buy magnetic test leads that will stick to the thermostat terminals, or you can buy test leads that have an alligator connector on each end, but these aren't absolutely necessary. A spare 3- or 4-inch piece of 18-gauge thermostat wire with stripped ends works just as well. The low voltage at a thermostat isn't hazardous, so you could even use a paper clip.
1. Expose the Thermostat Wires
Remove the thermostat cover or face, which usually just snaps off, and remove the temperature sensor by unscrewing the screws with a Phillips screwdriver and lifting it off. Not every thermostat has a separate plate for the sensor; you may see the thermostat wiring connected to the wall plate as soon as you remove the cover.
2. Find the Power Wire
The power wire should be red, but not every installer pays attention to the standard wire colors. A better way to identify the wires you want is to look at the identification letters on the terminals. The power terminal is labeled R. If you have a heating and cooling system, the power terminals are Rc and Rh. They are usually bonded together with a small metal clip or wire; in this case, the Rh wire attached to the Rh terminal also powers the Rc terminal.
3. Make Sure the Thermostat Has Power
Locate the C terminal. C stands for common, and a C-wire provides a return path for the circuit that powers the thermostat. Set a multimeter to read volts in the 24 VAC range. Touch one of the tester's lead to the R terminal, and touch the other lead to the C terminal. Note the reading: as long as it's somewhere between 22 and 28 VAC, the thermostat is receiving power from the transformer.
Tip
If you have a mechanical thermostat or one with batteries, you might not find a common wire. You may also have a smart thermostat with Wi-Fi capability, such as a Nest thermostat, that's designed to work without a common. In that case, just skip step 3.
4. Make a Jumper Wire
Cut a 3- or 4-inch length of 18-gauge thermostat wire. Strip about 1/2 inch of insulation from each end, using wire strippers. Bend the wire into a horseshoe shape.
5. Choose an Equipment Function to Test
Select the function to test by checking the labels on the terminals or consulting the wiring diagram for the thermostat model. Any terminal you use must have a wire attached to it.
- To test the blower, use the G terminal.
- To test the heating system, use the W terminal.
- To test the cooling system, use the Y terminal.
- If you have a heat pump system, you can test the reversing valve for the compressor with the O/B terminal.
- If the thermostat controls a humidifier, dehumidifier, or some other auxiliary equipment, use the appropriate AUX terminal.
5. Bypass the Thermostat
Touch one end of your jumper wire to the R terminal and the other end to the terminal for the function you want to test. If the equipment related to that function switches on (and it previously wasn't working), you have a faulty thermostat.
How to Jump Test a Thermostat: Alternate Method
If you don't have a thermostat jumper wire available, it's no problem. You can still jump test your old thermostat. You'll be handling thermostat wires during this procedure, but power comes from the transformer at 24 volts (24 VAC), which is a low voltage, so you can do it without fear of a serious shock. Even so, it's a good idea to turn off the power to avoid touching wires together and blowing a fuse in the control board while you're troubleshooting the thermostat.
1. Switch Off the Power
Locate the disconnect switch for the furnace or air system and turn it off. If you can't find the switch, turn off the circuit breaker in the main service panel (breaker box) that controls the equipment.
2. Twist the Wires Together
Remove the cover or face of the thermostat to expose the thermostat base and the thermostat wires. Loosen the R terminal with a screwdriver, and disconnect the wire (typically a red wire) from the terminal. Do the same with the wire and terminal controlling the equipment (function) you want to test, such as the furnace or blower, air handler, or air conditioner. Twist the to two wires together. Be careful not to let the wires fall behind the wall while they are disconnected.
3. Turn On the Power
Turn on the disconnect switch or breaker, and wait a few minutes to see if the equipment starts. If you're testing the blower, air conditioner, or heat pump, you should hear it come on. If you're testing a gas furnace, you should hear the draft inducer fan come on followed by the whooshing sound of the burners igniting.
4. Reconnect the Wires to the Thermostat
Turn the power back off, untwist the two thermostat wires, and reconnect each to its terminal.
Tip
If you want to test another equipment function, leave the red wire disconnected and twist it together with the wire that controls that function. If any equipment that hadn't been working starts up during the test, you need a new thermostat, so you may want to leave the current thermostat disconnected until you replace it.