
How to Build a Boulder Rock Retaining Wall
Boulder rock retaining walls look natural in any landscape. A retaining wall needs to be strong to support the soil behind, and boulders naturally perform this task. Boulder walls provide the look many homeowners are looking for and the functionality necessary for an effective retaining wall.
Boulder rock retaining walls look natural in any landscape. A retaining wall needs to be strong to support the soil behind, and boulders naturally perform this task. Boulder walls provide the look many homeowners are looking for and the functionality necessary for an effective retaining wall. Here are the steps to build a boulder rock retaining wall.
Things You Will Need
- Stakes
- Shovel or bobcat
- Landscape fabric
- Boulders, in a variety of sizes
- Lighter
Tip
The weight of the boulder rocks makes them a highly effective retaining wall. When built with each row leaning in, they will settle with the help of the weather and gravity to create a boulder rock retaining wall that will be an attractive and functional part of your landscaping.
-
The uses for the boulder retaining wall determine the equipment needed to prepare the location in your landscape. Determine the height needed for the boulder wall and stake out the length, corners, and any variations wanted for the finished wall. Use a shovel or larger equipment to cut down the dirt where the boulder rocks will be placed. Ensure that the dirt wall gradually slants inwards.
-
Place a line of landscaping fabric against the dirt wall, with some of the fabric on the ground for the boulder to sit on, and the rest going up the dirt edge for the second row of boulders. The landscaping fabric comes in many thicknesses and weight. The thinnest fabric you can use is the 25-year protection type, which can be found at the hardware store. For heavier fabric, needed for higher boulder walls, go to the nursery or landscape store.
-
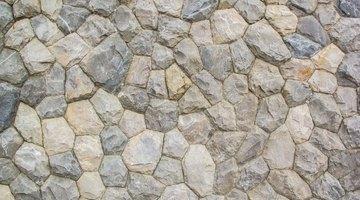
The boulders need to be the correct size, according to the size of the wall, for both strength and aesthetic value. Get a good selection of large, medium and small sized boulder rocks. Use field stone, granite, limestone or other types of natural stone. Select the boulders by size and begin using the largest. Begin placing the bottom row of boulders on top of the fabric, ensuring they are touching one another. Place six to eight of the largest boulders down and go back to start the second row. If the boulders are not tight against the dirt wall, pull the fabric forward and fill behind the boulder.
-
Place the second row of boulders so they fit the contour of the bottom row of boulders, making sure they lean back into the wall of dirt. It is best to place the second row so the boulders fit on top of the joint where the bottom two boulder rocks connect and ensure that the landscape fabric is placed behind each rock. To add variation to your retaining wall, some boulders can be placed in a vertical position. This may take up two rows, depending on the size of the boulder, and can be worked around to create a good look. Continue with the bottom row and second row to create a lock-in style for the retaining wall base. Each subsequent layer can be created in the same manner.
-
Use the small rocks to fill in where there is a large gap between rocks. Roll the landscape fabric over the top of the dirt if adding landscape rock, to create a clean edge on the top of the boulder wall. If not, cut the fabric back and use a lighter to quickly seal the edges of the fabric.
The Drip Cap
- Boulder rock retaining walls look natural in any landscape.
- The uses for the boulder retaining wall determine the equipment needed to prepare the location in your landscape.
- The boulders need to be the correct size, according to the size of the wall, for both strength and aesthetic value.
- Use field stone, granite, limestone or other types of natural stone.
- Place the second row of boulders so they fit the contour of the bottom row of boulders, making sure they lean back into the wall of dirt.
- Each subsequent layer can be created in the same manner.
Writer Bio
This article was written by PocketSense staff. If you have any questions, please reach out to us on our contact us page.
More Articles