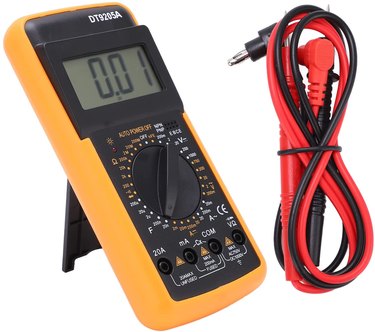
The DT9205A digital multimeter can be used to test and measure a multitude of electrical issues, making it a good all-around meter. Many of the functions of this digital multimeter go beyond the needs of most homeowners, but the average user of the DT9205A digital multimeter will be testing continuity, resistance, and voltage, all of which are easy.
Warning
To effectively use your multimeter, follow a few important guidelines. Ensure your multimeter is set to the proper measurement. When attempting to measure resistance, don't mistakenly leave the power on at a component or you can damage the meter. Finally, keep the probes clean and dry because moisture lowers their resistance and can alter measurements.
Video of the Day
Use the DT9205A to Check Continuity
Setting up the DT9205A for use starts with inspecting and plugging in the test leads. The test leads are insulated to protect you from getting an electric shock. Inspecting them to make sure that they have not been damaged is always the best and safest way to start using the digital meter. Another good practice is to check that the leads and meter are working using the continuity setting to check for resistance, also known as ohms.
Video of the Day
- Plug the red lead into the port with the V and ohms symbol, which looks like a horseshoe.
- Plug the black lead into the port labeled COM.
- Select the dial for continuity, identified by the symbol of a sound pattern.
- Touch the two leads together. This will tell you the leads are functioning by making an audible sound and reporting zero on the digital screen.
- If no audible sound or digital readings occur, change from "1" ("1" indicates an open circuit and any reading outside of "1" is a measurement of resistance); then check that the leads are securely plugged into the proper ports and the dial is set to continuity. If no sound or change occurs, then the leads need to be replaced.
- After verifying that the meter is working as it should, use the two leads to check the continuity of the circuit to be tested. Remember,"1" designates an open circuit.
- While the leads are in this configuration, you can use them to test other resistance type values by selecting the value you want to measure with the dial.
Measure Voltage on the DT9205A
The DT9205A meter can be used to test both AC and DC voltages. AC is indicated by a single squiggly line and DC by a solid line over a dashed line. The meter is rated for 1,000 volts — for safety, never exceed this voltage. If the voltage is out of the function range, "1" will display on the digital screen.
- Select the voltage type, AC or DC. It is always a good idea to select the higher value and work your way down, especially if the actual voltage is unknown.
- Plug the black lead into the port labeled COM on the digital multimeter. This is the negative lead.
- Plug the red lead into the voltage port indicated with the V and ohms symbol. This is the positive lead.
- Using the two leads, test the voltage of the circuit desired. If the digital readout shows a negative value, then the test leads are backwards.
Maintain Your Digital Meter
Some things to be aware of regarding the DT9205A digital meter are for your safety as well as the meter's. The single 9-volt battery in the meter may need to be changed from time to time for best performance. When the battery is low, a battery indicator will display on the screen. Another item to maintain is the 0.5 a/250V fuse that is in the meter. This fuse protects the digital circuitry inside the meter. If either of these items needs to be replaced, shut off the meter and disconnect the power.