You can use rubber cement glue for shoes with holes or small tears. While you could purchase a shoe repair kit or new footwear entirely, it's easy to apply rubber cement to shoes for last-minute repairs at a fraction of the cost.
Plan to use rubber cement glue on shoes made of leather, fabric, or rubber. Because it's moisture-resistant and stays flexible when dry, the product also works well as glue for shoe soles. In some cases, this affordable product won't offer a permanent fix and may not fully fix blown-out sneakers, deeply scratched leather boots, or footwear with broken heels.
Video of the Day
Video of the Day
Warning
Always work in a well-ventilated area. Even using rubber cement glue for shoes or other small repairs can create strong fumes.
How to Repair a Hole or Crack With Rubber Cement
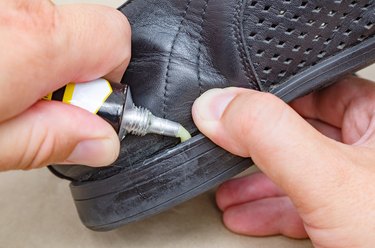
Rubber cement makes a great addition to a DIY shoe repair kit. When painted over cracks or holes in shoes, rubber cement acts as both a repair glue and moisture-resistant protectant against further damage.
To use rubber cement glue for shoes with holes or cracks:
- Wear gloves to avoid bonding your skin together with rubber cement.
- Cut a piece of napkin, paper towel, or fabric into a shape twice the size of the hole or tear.
- Put the cut scrap inside the shoe and align it with the hole.
- Brush a thick layer of rubber cement over the outside of the hole. Make sure the rubber cement soaks into the scrap so that the shoe and repair material stick together.
- Place the shoe in a well-ventilated area until the rubber cement is dry. (The time varies according to the shoe material.)
- Apply a second coat to strengthen the bond between the shoe and repair material.
- Allow the rubber cement to fully dry overnight before wearing the shoe.
How to Repair Shoe Soles With Rubber Cement
Rubber cement can also work as glue for shoe soles. Because rubber cement remains flexible after drying, you can walk in your repaired shoes without worrying about the glue cracking or the sole snapping off. The moisture-resistant nature of the product makes it a great solution for shoes that you'll wear while hiking or running.
- First, thoroughly clean the shoe. Loose dirt and dust will keep the rubber cement from sticking.
- Put on gloves to keep the rubber cement from bonding to your skin.
- Brush a thick coat of rubber cement onto the exposed section of the sole.
- Brush another thick coat of rubber cement onto the exposed section of the bottom of the shoe.
- Press the sole onto the shoe.
- Apply firm pressure, actively squeezing the sole onto the shoe for a couple of minutes.
- Place the shoe on a flat surface and then top it with a rock or other heavy object. This will help hold the sole and shoe together while you're waiting for the rubber cement to dry.
- Allow the rubber cement to dry overnight before inspecting the reattached sole.
- If you notice gaps between the edge of the sole and the bottom of the shoe, apply another thick coat of rubber cement around the edge. Then, place the shoe upside down (so that the rubber cement is not touching any other surfaces) and allow the glue to dry overnight.