Things You'll Need
Replacement brake pads
Brake fluid
Lug wrench
Car jack
Jack stands
Wheel chocks
Socket set
Pliers
Flat head screwdriver
Torque wrench
Plastic tubing
The Pontiac Vibe is mechanically identical to the Toyota Matrix so the repair manuals available cover both cars. Replacing your brake pads is one of the simple jobs you can do at home to save money while keeping your car running well. Brakes are equipped with squeal pads that will make a noise when the pad is wearing thin. If you've been hearing your brakes squeal when you come to a stop, it's probably time to replace the brake pads.
Step 1
Loosen, but do not remove, the lug nuts on the front wheels with a lug wrench. Raise one side of the car with a jack. Position a jack stand underneath the frame rail behind the front tire and lower the jack. Raise the other side of the car and put another jack stand underneath the frame rail. Lower the car onto the jack stands with the jack. Place chocks behind the rear wheels of the car.
Step 2
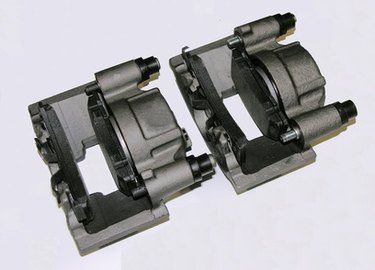
Remove the lug nuts from the front wheels then remove the wheels from the car. Remove the two bolts holding the brake cylinder assembly onto the brake disc. Be careful not to damage the brake fluid line attached to the brake cylinder. Slide the cylinder assembly off the disc. Use a piece of stiff wire to hang the brake line to prevent damage.
Step 3
Pry the brake pads out of the cylinder assembly with a flat head screwdriver. Note the orientation of the brake pads, shims and squeal plate. Install the new brake pads in the same orientation as the old ones. Use a pair of pliers to push the brake pads apart far enough so that you can slide them over the brake disc.
Step 4
Reinstall the mounting bolts to 79 foot-pounds of torque with a torque wrench. Repeat the above steps for the other front wheel. If you are unable to pry the brake pads apart far enough to slip them over the disc, you may need to bleed the brake line. Locate the bleeder plug on the back of the cylinder assembly. Loosen the plug and attach a vinyl tube to the bleeder plug and put the other end of the tube in a jar. Pry the pads apart until you can slip them over the disc. Tighten the bleeder plug to 74 foot-pounds of torque.
Step 5
Remount the front wheels. Tighten the lug nuts in a star pattern. Start with the top nut then draw an imaginary star to the lower left and tighten that nut. Continue the star pattern to the upper right, upper left then lower right.
Step 6
Raise one side of the car with the jack until you can remove the jack stand. Remove the jack stand and lower the jack. Raise the other side and remove the other jack stand then lower the car. Remove the wheel chocks. Tighten the lug nuts to 103 foot-pounds of torque, again using a star pattern.
Tip
Pump the brakes, after installing the pads, to regulate the brake fluid in the system.
Warning
Brake fluid is highly corrosive on paint. Wipe it off immediately if it comes into contact with any painted surfaces.