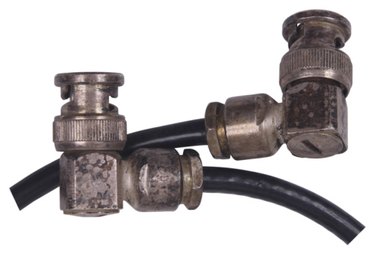
Coaxial (or coax) cable is used to transfer radio frequency radiation from a radio or television transmitter to an antenna. Such cable consists of a metal wire in the center and an outer metal braid mesh separated by a foam-like insulation material called the "dielectric." Some lengths of coaxial cable can become damaged where the dielectric becomes cracked or pulled apart, allowing the inner wire to come into contact with the outer braid. This causes a short that can damage the transmitter. Cable may be tested for connectivity issues by performing conductivity tests with a multimeter.
Step 1
Coil the coax cable so the connectors on both ends can be reached easily with the metal probes of the multimeter.
Video of the Day
Step 2
Insert the test probe wire plugs into the multimeter, inserting the black negative (-) wire plug into the multimeter's "COM" jack and the red positive (+) wire plug into the jack marked "+" on the multimeter.
Step 3
Turn on the multimeter and rotate the measurement-type dial to measure ohms, or resistance. In this area of settings, look for the selection labeled "CONT" or "Continuity" and set the needle of the measurement dial to this setting. Touch the metal probe tips together to create an electrical short and observe that a tone is emitted from the multimeter signaling that the continuity tester of the instrument is working correctly.
Step 4
Touch the black negative metal probe to the center pin (if there is a connector) or center wire (if no connector) on one end of the coaxial cable, without allowing it to touch the outer jacket of the connector or the braided wire on that end. The tip should be making contact only with the center pin of the connector or the center wire of the cable.
Step 5
Touch the red positive metal probe to the center pin or wire on the other end of the coaxial able, making sure the metal tip is touching only the center and not making contact with any other metal. If a tone is emitted from the internal speaker of the multimeter, this signals that the center wire is not broken along the length of the cable and that the center wire is healthy.
Step 6
Move the black negative metal probe from the center pin, or wire, and touch the outer jacket of the connector. If the coaxial cable is being tested without connectors on it, touch the tip of the probe to the braided outer wire of the cable. Keep the tip of the positive probe on the center wire of the other end. Note whether a tone is emitted from the multimeter. There should be no electrical connection between the center wire and the outer jacket or braided wire, therefore no tone should be heard. If a tone is heard, this indicates the insulation is broken in the length of coax, allowing the inner and outer wires to touch (short) together. This indicates the coax cable should be replaced with a new length of cable.
Video of the Day