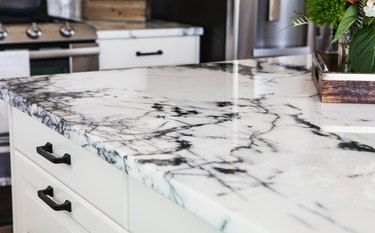
Quartz can be engineered to look like granite or marble, but unlike either, quartz is a semi-synthetic material. Manufacturers fashion quartz countertops using 93 percent ground quartz (silicon dioxide) and 7 percent resins, polymers and pigments. The result is a hard, nonporous surface that is almost invulnerable to scratches. "Almost" is not the same as "completely," though, and partly because of its resin content, a quartz countertop can and does sustain scratches. To repair large scratches, you sometimes need to apply a resin filler, but you can remove small scratches with polishing compound using much the same procedure you would to remove scratches from a car finish.
Removing Scratches from Quartz
Video of the Day
Step 1: Start With a Clean Surface
Clean the quartz with soapy water and a cloth or an ammonia-based cleaner. Be sure to also clean any scratched areas as well. Dry the surface with a dry cloth.
Video of the Day
Step 2: Fill Deep Scratches
Because it contains resin and polymer binders, a quartz countertop will accept a resin filler. It's best to use a product intended specifically for quartz repair, but in a pinch, you can use super glue or a two-part epoxy.
Apply the filler with a syringe to ensure you get as much as possible in the crack and as little as possible outside it. Let the filler set overnight, and then scrape off the excess with a razor blade. Hold the blade at a 45-degree angle, and work carefully to avoid creating even more scratches. The area around the scratch may feel a little rough after scraping, but you'll be able to smooth it down with polishing compound.
Step 3: Get the Right Materials
When you polish quartz, you're essentially polishing the resin binder, and you need a compound that can do that without creating more scratches. You can buy the polishing compound -- plus the resin filler and all the polishing pads you'll need -- online or from a countertop dealer. A typical polishing system consists of several abrasive compounds of progressively finer grits. You use the coarser grits to remove the scratches and the finer ones to restore sheen and color.
Step 4: Start With the Coarsest Compound
Pour a silver-dollar-sized pool of polishing compound on the counter and spread it around with a lambswool polishing pad attached to a variable-speed grinder. Set the grinder at its lowest speed, which is approximately 2,800 rpm. Polish the entire surface -- not just the areas with scratches. Keep light and even pressure on the grinder to avoid generating enough heat to melt the resin. When you're done, remove all the excess compound with a squeegee, then wipe the surface down with a nonabrasive cloth rag.
Step 5: Keep Polishing With Finer-Grit Compounds
Use a new pad each time you change compounds. Some systems include a powdered compound that you use just prior to the final one. Use a felt pad -- not a wool one -- to work this compound, and keep a bottle of water handy to wet down the surface as you polish. Remember to remove all the compound from the surface before starting to work with the next one.
Step 6: Clean Up
Wipe down the surface with clean water after you've finished working the final compound.