Floating floors are not attached to the subfloor with glue or nails. Although this may seem to offer less stability, it actually doesn't — given the flooring is properly installed.
Laminate planks that are designed to float have a locking system similar to the tongues and grooves on hardwood boards. Once you snap the planks together, they stay that way. But that's provided you follow basic laminate installation guidelines.
Video of the Day
Video of the Day
Installing Laminate Flooring for Beginners
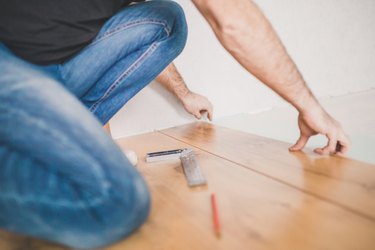
When installing laminate flooring, allow a 1/4-inch expansion gap around the perimeter to allow for seasonal expansion and contraction of the flooring. Then, install baseboards to hold the flooring down. Level the subfloor to remove any bumps that can push against the joints and separate the laminate planks. Rack the floor correctly, which means to stagger the end joints randomly and with enough space between them to prevent the end joints from separating.
Racking a laminate floor is a little more difficult than racking a hardwood floor because laminate planks are all the same length, whereas hardwood boards tend to come in different lengths. The uniformity of the planks makes it more difficult to create a truly random stagger pattern, which is one with no discernible spacing patterns between the end joints.
You don't necessarily have to plan ahead for a suitable laminate floor pattern, but you do have to have an eye toward subsequent rows as you cut the first plank in any given row. The length of that plank determines the length of the last plank in the row, and if you choose carefully, you can use the last plank to start the next row. This technique helps reduce waste.
The Importance of a Flooring Stagger Pattern
Racking the floor to create a random stagger pattern serves two purposes: one that is aesthetic and the other, structural. Both are equally important.
In terms of aesthetics, staggering the end joints avoids creating lines that run perpendicular to the direction of the floor. When these lines are visible, they obviate the fact that the floor is composed of identical panels and detract from the illusion that the flooring's hardwood pattern is trying to create.
Structurally, adjacent end joints that coincide or occur close to each other are more likely to separate. When the end joints are properly staggered, each end joint gets reinforcement from the planks on either side. Adjacent end joints tend to weaken each other, increasing the likelihood of a gap forming in one or both of them.
The Recommended Distance Between End Joints
The rule of thumb that professional flooring installers follow is to stagger the end joint of adjacent rows by a distance equal to 2 or 3 times the width of the plank. That makes 6 inches the most common minimum spacing for 2- and 3-inch hardwood boards, but laminate planks are typically wider than this. They can be anywhere from 5 to 12 inches wide, so following this rule is impractical when installing a floating floor.
In practice, a minimum spacing of 6 inches works well for 5-inch laminate planks. If the planks are wider, you can increase the minimum to 8 or 10 inches. Although it's fine to make the spacing even wider than this, it seldom makes sense to maintain a minimum of more than 10 inches. Doing so makes it difficult to avoid H-joints, which, in the art of installing laminate flooring for beginners, is one of the most common racking mistakes.
The length of the planks you're installing is a limiting factor when spacing end joints. Laminate flooring planks come in 3- and 4-foot lengths, and when you're installing 3-foot planks, you'll want to use a shorter spacing to avoid H-joints.
Two Patterns to Avoid: H-Joints and Steps
You may observe the correct spacing pattern when installing one row of flooring next to another, but if an end-joint in the third row lines up with one in the first row, you've created an H-joint. This type of joint is immediately noticeable in the finished floor, and it detracts from the flooring pattern almost as much as two end joints next to each other. A coinciding joint separated by two planks is not quite as noticeable, but it should also be avoided.
Similarly, you may observe the correct spacing in two adjacent rows, but if the spacing in the third row is exactly the same, you've created a step pattern. Also known as lightning, a step pattern is draws the eye by being regular and symmetrical, and professionals avoid it.
The goal when creating a flooring stagger pattern is to distribute the ends joints as randomly as possible. This can be challenging when installing planks that are all the same length, but if you use the following technique, you'll be able to do it while wasting a minimum of flooring and without having to use a plank flooring layout calculator.
A Technique for Creating a Stagger Pattern as You Go
Laminate flooring planks are like puzzle pieces. When you cut the end off a plank to fit it into the end of a row, you can't use the cutoff in the middle of the row. But you can use it to start the next row — and that's the key to staggering with a minimum of waste.
First, measure the length of the room and divide that by the length of a board. If you come up with a fraction greater than the minimum stagger spacing, go ahead and use a whole plank to start the first row. If the fraction is smaller, cut about twice the spacing amount off the first plank. Save the cutoff as you might be able to use it at the end of a row somewhere.
Install the first row and cut the last board in the row to fit, remembering to maintain a 1/4-inch gap from the wall. Use the cutoff to begin the next row.
Then, lay the second row and cut the final plank to fit. But instead of using the offcut to start the third row and creating a step pattern, set it aside for later. Cut the first plank in the third row a random length that maintains the proper spacing without creating an H-joint.
Use the offcut from the second row to begin the fourth row and the one from the third row to begin the fifth row. Then, cut a random length to start the sixth row, using the offcut from the fourth row to start the seventh row, and so on.
This isn't the only way to create a random flooring stagger pattern, though, and it may need modifications when something, such as a cabinet, is in the way. You're bound to have some waste at the end of the installation, which is why it's always a good idea to buy 10 percent more flooring than you think you need. But you'll have less waste using this technique than if you simply cut boards randomly to start each row.