Things You'll Need
Phillips or slotted screwdriver
4-inch square metal junction box
Hammer
Pliers
2 3/4-inch clamp connectors
Utility knife
Pocket knife
10-gauge bare copper wire
Blue wire connectors
4-inch square cover
Non-contact voltage tester
Electrical junction boxes aren't used just to provide convenient ways to mount receptacles, switches and light fixtures. They're actually required by the National Electrical Code when making a wire connection. When you repair a cut in an electrical cable or splice electrical wires together, you need a junction box to protect the connections. Using a junction box also protects you from electrical shock and your home from electrical fires. Following the proper steps when making wiring connections can keep you and your family safe.
Step 1
Position a screwdriver against a 3/4-inch knockout on the side of a 4-inch square metal junction box. Strike the screwdriver with a hammer to remove the knockout. Grab the knockout with pliers and twist it off the box if the screwdriver does not remove the knockout completely. Repeat the steps to remove the knockout on the opposite side of the box.
Video of the Day
Step 2
Fasten 3/4-inch clamp connectors to the 4-inch square junction box through the knockouts. The connectors thread from the outside of the box with the threads of the connectors inside. Screw the locknuts provided with the connectors onto the threads to secure the clamps to the box.
Step 3
Verify there is no power present by touching the wires with a non-contact voltage tester. Push the American wire gauge 8 (AWG 8) inside the 4-inch square junction box through the 3/4-inch clamp connectors. In normal wiring applications, a circuit with AWG 8 wire includes three or four wires as a parts of 8/2 or 8/3 nonmetallic (NM) cable.
Step 4
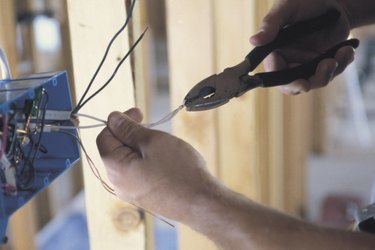
Cut the black exterior sheath off the electrical cables with a utility knife to expose the AWG 8 wires inside. Remove 3/4 inch of insulation from the wires with a pocket knife. AWG 8 wire is too large for a wire cutter/stripper.
Step 5
Cut a 6-to-8-inch piece of 10 gauge solid bare copper wire to create a pigtail ground wire. The ground wire size for AWG 8 is one gauge smaller than the insulated wires. Wrap the wire clockwise around a 10/32 green ground screw inside the junction box. Tighten the screw to hold the wire inside the box, creating a ground to the junction box.
Step 6
Twist the blue wire connector onto the two white AWG 8 wires inside the junction box to join them. Do not twist the two wires together before installing the wire connector. Instead, let the motion of the connector twist the wires. This makes a better wire connection and avoids a loose wire connector.
Step 7
Twist another blue wire connector onto the two bare copper wires and the bare copper pigtail ground wire attached to the junction box. Twist another blue connector to the two AWG 8 black wires. If you're working with a 240-volt circuit, use another blue connector to join the two red AWG 8 wires.
Step 8
Tighten the screws on the clamp connectors to hold the NM cable securely in the junction box. Pack the sets of wires inside the 4-inch square junction box and cover the box with a 4-inch square cover. Secure the cover to the box with the provided screws.
Video of the Day