Things You'll Need
Fabric
Tape measure
Scissors
Pins
Sewing machine with zigzag stitch
Thread
Iron
Ironing board
Large safety pin
Cord, yarn, ribbon or shoelace for drawstring
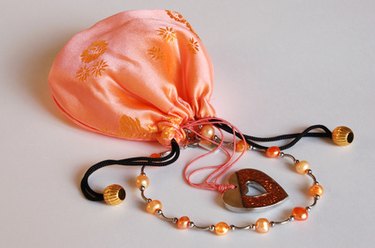
You can sew quick and easy drawstring bags in any size. Use drawstring bags as eco-friendly gift-wrap that becomes part of the gift, for potpourri sachets, or to organize sets of blocks or other small toys. Choose sturdy fabric for large bags and luxury fabrics such as velvet and satin for jewelry pouches. You can make a quick and easy drawstring bag or pouch in under an hour, or make several simultaneously to save time.
Step 1
Determine the desired size of the finished drawstring bag. Add 2 inches to the height measurement; multiply the width measurement by 2 and then add 1 inch. Cut a fabric rectangle to these measurements.
Video of the Day
Step 2
Fold the fabric in half vertically, right sides together. Pin the sides and bottom edges together.
Step 3
Sew across the bottom edge of the bag with a 1/2-inch seam, starting from the fold. Pivot the fabric at the corner and sew along the side toward the top, still using a 1/2-inch seam. Stop when you are 2 1/2- inches from the top; sew 1/2-inch in reverse.
Step 4
Zigzag close to the seam, between the stitching and the raw edge of the fabric. Trim the fabric close to the zigzag. Do not zigzag or trim the fabric above the seam.
Step 5
Fold over both of the 1/2-inch un-sewn seam allowances above the side seam, wrong sides together. Zigzag next to the raw edge of the fabric on both sides.
Step 6
Fold over 1/2-inch around the top edge of the bag, wrong sides together, and press.
Step 7
Fold over another 1-inch around the top edge of the bag, wrong sides together, and press. Pin into place along the fold.
Step 8
Stitch around the bag, 7/8-inch from the top edge, to form the casing for the drawstring. Turn the bag right side out.
Step 9
Cut a length of drawstring three times the finished width of the bag. Insert a large safety pin into one end of the drawstring and thread the safety pin through the casing. Pull the drawstring ends together evenly and tie an overhand knot close to the ends.
Tip
When making several bags, complete the current step on each bag before moving on to the next step.
Video of the Day