
How to Repair Damaged Ceiling Tile

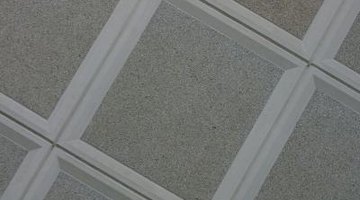
Ceiling tiles in drop ceilings are generally made of fiberboard or acrylic. When the tiles become stained or cracked you can replace or repair them. It is always best to replace the tiles when possible, but repairing a tile may be the option chosen in some situations. With either fiberboard or acrylic, cracks are repaired using a fiberglass repair kit. The fiberglass will provide a stiff patch that will hold the tile together.
-
Spray the ceiling tile with spray paint the color of the tile if the tile is stained. Sometimes water leaks can discolor a ceiling tile, and painting the tile with spray paint will make it look new again. Paint in a well ventilated area. Hold the can of spray paint 6 inches from the surface of the tile and spray back and forth in the same direction over the entire surface of the tile.
-
Lay the pieces the tile face down on a flat surface. Fit the pieces together the way the tile would be if it was not broken.
-
Use scissors to cut the fiberglass fabric into strips to fit the entire length of the cracked or broken area on the tile. Mix the epoxy and the hardening agent from the fiberglass repair kit together according to the directions. Use an old coffee can or similar container in which to mix the ingredients.
-
Brush the epoxy mixture onto the entire area of the crack on the back of the tile. Lay a strip of the fabric flat along the the crack.
-
Spread the epoxy mixture over the fabric until it is entirely covered with the epoxy. Lay another strip on top of the first strip and brush epoxy on that strip. Repeat this process until you have layered four or five strips with epoxy on each layer. Let the patch dry 24 hours before trying to replace the tile into the ceiling grid.
Writer Bio
Damon Koch has years of writing experience ranging from software manuals to song lyrics. His writing has appeared in software manuals for Human Arc and on the CDs "Small Craft Advisory" and "Impersonating Jesus." He also has worked in building maintenance since 2004. He has attended Lorain County Community College as well as Cleveland State University.
Photo Credits
- Photos.com/Photos.com/Getty Images
More Articles