Restaining and refinishing aren't necessarily synonymous; it's possible to darken the color of your dining room or coffee table without removing the finish. Most of the time, though, restaining involves stripping, sanding and -- yes -- refinishing. Refinishing a table is a process that gets more satisfying as it progresses, but it starts out messy and unpleasant. The tribulations of stripping the wood won't deter you, though, when you remember the best is yet to come.
Off With the Old
Video of the Day
Unless your table is too big to move, it's best to do the stripping job in a workshop area or outside. Use a conventional methylene chloride stripper or, if you have time and want to make sure you avoid skin burns, a soy- or citrus-based product. Spread the stripper with a paintbrush; you'll know it's working when the finish begins to bubble and separate. Scrape the stripper off with a paint scraper as soon as you see this -- you don't want to let the stripper dry, or it won't come off. If the stripper does dry, don't worry; you can moisten it by adding more. After scraping all the stripper off, clean and neutralize the residue by washing the table with clear water.
Video of the Day
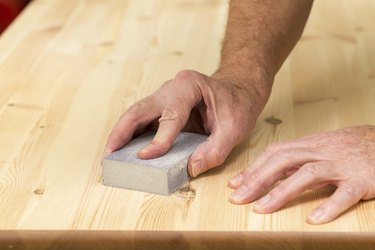
Get the Stain Out
To guarantee uniformity of color when you apply the new stain, you have to remove all the old stain from the wood, and the best way to do that is to sand it. It's best not to use sanding machines, especially when you sand turnings and delicate features on the legs -- but since a palm sander saves time and effort, you'll probably want to use one. Don't use paper coarser than 120-grit with an orbital sander; you may find it difficult to sand out the circular scratch marks it leaves. After sanding the wood with 120-grit sandpaper, go over it by hand with 150-grit paper -- sanding with the wood grain -- to remove scratch marks. If you're going to use a water-based stain, finish-sand with 180-grit paper.
Applying the New Stain
The procedure for applying the stain is the least demanding step in the entire refinishing process. If your table is made from pine, birch or any other resinous wood that accepts stain unevenly, brush on a coat of wood conditioner before staining to ensure uniform color. Apply liquid stains with a brush and gel stains with a rag, wiping or brushing with the wood grain to avoid streaking. Wipe off any stain that doesn't soak in within five or 10 minutes of applying it, using a clean, dry cloth. Allow the stain to dry from four to eight hours -- preferably overnight -- before coating it with a protective finish.
Putting the "Finish" in "Refinish"
The final procedure in the refinishing process -- and the one that you may find the most satisfying -- is applying the clear finish. The protective coating deepens the stain color and adds luster and shine. You can choose from several methods, including wiping on an oil finish and waxing it; spraying lacquer from a can or using spray equipment to spray it; or brushing on polyurethane or water-based acrylic lacquer -- which are similar materials. Build the finish by applying a coat, waiting for it to dry, then scuffing it with 320-grit sandpaper and applying another coat. Two coats of a brushable product or penetrating oil are usually enough, but you'll probably want more if you're spraying lacquer.