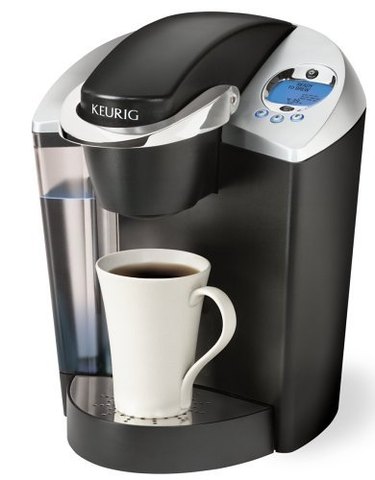
If you own a Keurig coffee maker, you probably appreciate how quickly it delivers that first cup of caffeine elixir in the morning. It can do this because it stores about a cup of water inside the housing. It's a good idea to drain this water occasionally, especially if you aren't a regular coffee drinker, and you allow the coffee maker to sit for several days at a time. The coffee maker doesn't have a drain plug, so the procedure for removing the water isn't obvious. You can do it in one of two ways: Disassemble the coffee maker using the manual to guide you or -- much less complicated -- turn the machine to brew and let it drain itself.
Brew the Water Out
Video of the Day
You can trick the Keurig into brewing a cup of hot water even though the external reservoir is empty. If you keep your eye on the LED display, you'll note that it says PRIME when the brewing is complete. This means the internal reservoir is empty. You may have to brew more than once before you get the PRIME message.
Video of the Day
Step 1: Adjust the Float in the External Reservoir
Empty the water from the external reservoir and look inside. You'll see a metal disk on one side near the bottom. Reach down and slide this disk to the top of its track. and give it a small push to make it stay there. Replace the reservoir. The coffee maker will now operate as if the reservoir were full.
Step 2: Press the Brew Button
Put a cup under the spout and press Brew. You don't need to put a coffee cartridge in -- and it's probably best to leave it off -- but there's no reason why you can't use the water you're draining to make a cup of coffee.
Step 3: Wait for the Prime Message
Watch the LED display. When the brewing is complete, it should tell you to add water. If that's the only message you see, remove the reservoir, reset the float and repeat the brewing procedure. After the second brewing, the message on the display should change to PRIME. The internal reservoir is now empty.
Emptying the Reservoir by Disassembly
The internal reservoir connects to a internal pump via a plastic hose, and if you can disconnect this hose, water will drain out of it. The location of the hose depends on the model -- to access it you may have to remove the bottom of the coffee maker or the panel on the side with the water reservoir. Unfortunately, the Keurig manual won't tell you how to drain the water, but it does tell the locations of all the internal parts, so it's good to have it handy.
Step 1: Check the Schematic
Your manual may show you the location of the internal drain hose, which helps you determine whether to remove the bottom panel or the side panel to access it. In most cases, you have to remove the bottom.
Step 2: Remove the Panel
Turn off the coffee maker; unplug it, and let it cool. Remove the screws holding the bottom or side panel, depending on which one you need to remove.
Step 3: Disconnect the Drain Hose
The drain hose is a white plastic tube that disappears inside the body of the coffee maker. You should be able to simply pull it off its fitting. If it's secured with a cable tie, cut the tie with a knife. Have an extra tie handy to resecure the hose after you're done.
Step 4: Let the Water Drain
Put the end of the drain hose into a cup -- or set the cup under the drain opening -- and let the water spill out. It may drain slowly, so be prepared to wait a few minutes.
Step 5: Reconnect the Hose and Reattach the Panel
Push the hose back onto its connector and secure it with a new cable tie, if necessary. Reattach the panel you removed to complete the procedure.