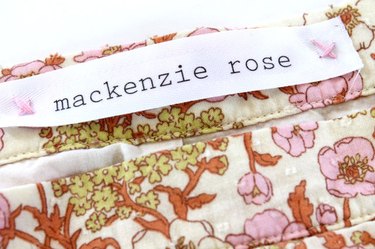
Capture the flag, s'mores, canoeing, campfire songs: these activities are just a few of the fun things your children will remember from this year's summer camp experience. But we all know that kids will be kids, and they don't always remember to keep track of their sweatshirts, pants and jammies while having fun. To keep their clothes out of the lost-and-found, attach some of these cute DIY laundry tags to them in three different ways. You'll have peace of mind knowing their clothes can be easily identified, and your kids can make sure they get everything back home where they belong.

Video of the Day
Things You'll Need
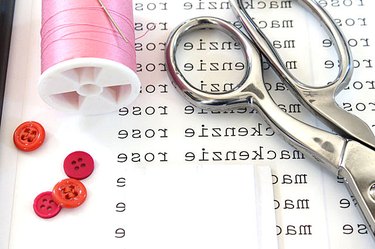
Iron-on transfer paper
Scissors
Twill tape or ribbon
Iron and ironing board
Buttons (optional)
Needle and thread
Pins
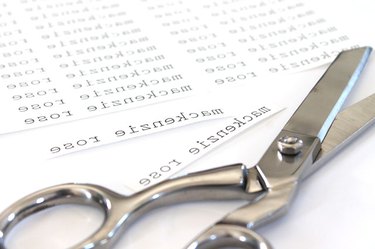
Step 1: Print Out Your Child's Name
Choose a fun font for your child's name and type as many as you can on one page. Before you print your document onto the iron-on transfer paper, flip the words horizontally so they are facing backward. On some computers, this step is called "mirror image" and is usually categorized in the "layout" settings. Print the rows onto iron-on transfer paper and let it dry for a full 30 minutes before cutting the names apart with a pair of scissors.
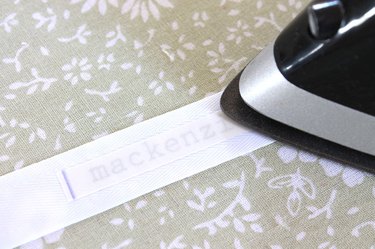
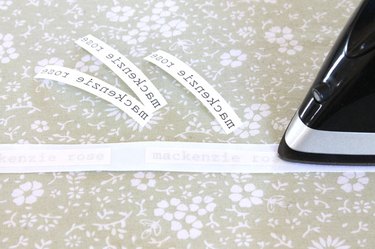
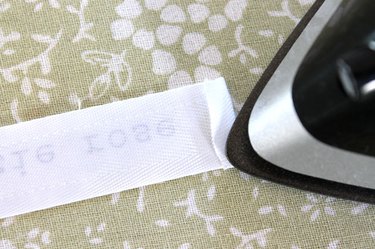
Step 2: Press the Names onto Twill Tape
Pre-heat your iron on a "high-cotton" setting with no steam. Place the names face down onto the twill tape and iron over the entire surface for 15 to 20 seconds.
Tip
Instead of cutting the twill tape before you transfer the names, you can iron on five or six at a time and cut them apart when you are ready to use them. This keeps the names organized and reduces waste.
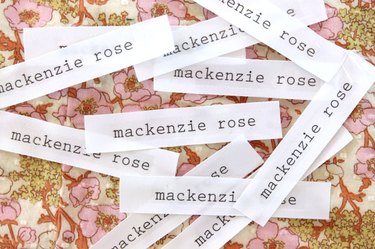
Step 3: Cut the Labels Apart
Use a pair of sharp scissors to cut the labels apart when you're ready to sew them onto your child's clothing.
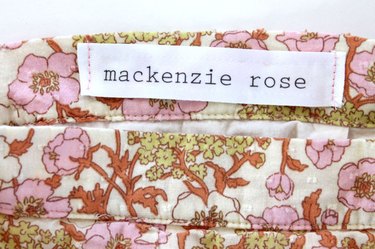
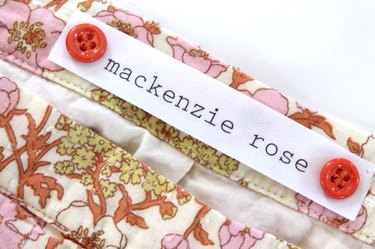
Step 4: Attach the Labels to the Clothing With Buttons
There are several ways you can attach the labels to your clothes. One fun and decorative way to secure the label is to sew it down with some colorful buttons on either side of the name.
Step 5: Or, Attach the Labels With Embroidery Thread
Another cute way to attach the labels is by hand-tacking them with embroidery thread and a needle.
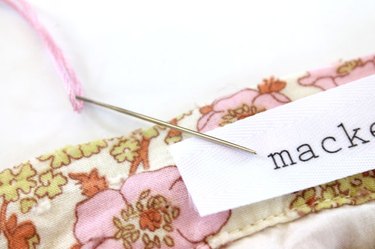
Start by threading the needle and knotting the end of the embroidery floss.

Then, tack both ends of the label with an "X."
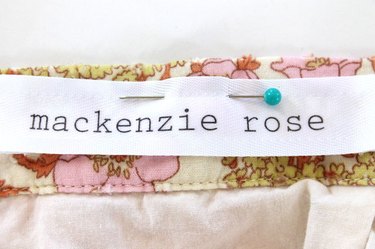
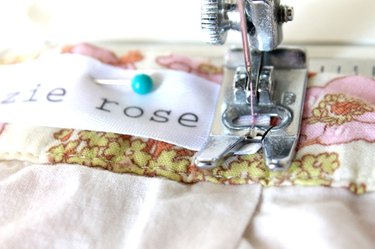
Step 6: You Can Also Sew Along the Sides
Finally, you can choose to sew along the short edges of the label. If you don't want the ends to fray, fold them 1/4 inch toward the wrong side of the twill tape and press with an iron.
Then, pin the label to the inside of your child's clothing to hold it in place while you sew.
Lastly, use a sewing machine to sew both ends of the tag to the clothes.
Step 7: Pack and Go
Now, pack your child's clothing with confidence. Since the clothes are safely labelled, they're sure to make it home without a hitch!