Things You'll Need
Bobbin with thread or a standard spool of thread
Sewing needle size 14 or style DHx1
The Singer Handy Stitch is a handheld portable sewing machine. The advantage of using the Handy Stitch is the machine can be brought to the project, such as sewing up a hem on a curtain. The Handy Stitch is battery operated using four AA batteries, so there is no need for an electrical outlet when using the portable sewing machine. Using the Handy Stitch involves grasping the machine in one hand while guiding the fabric with the other.
Step 1
Install a needle into the machine. Loosen the needle screw and insert the needle. The flat side of the shank needs to be facing the front of the machine. Push the needle in as far as it will go, then tighten the screw to hold the needle in place.
Video of the Day
Step 2
Install a fully wound bobbin by loosening the bobbin nut and placing the bobbin on top. Reattach the bobbin nut and tighten down. If a standard spool of thread will be used, attach the spool pin to the bobbin shaft, then place the spool of thread onto the shaft. Attach the white spool cap on the end of the spool of thread, then tighten down. The bobbin or spool should unwind facing forward toward the needle.
Step 3
Thread the machine by bringing the end of the thread through the thread guides and over the tension control. Take the end of the thread and pass it through the needle eye, from back to front, and pull it out a couple of inches.
Step 4
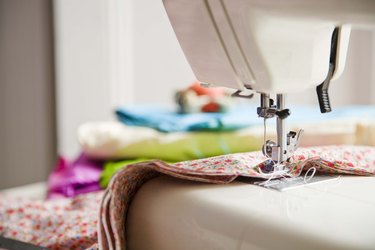
Lift the pressor foot and place the fabric underneath. The pressor foot has a spring to hold the fabric down as it is being sewn.
Step 5
Raise the needle arm to its highest position by turning the large handwheel on the side of the machine, which can be turned in either direction.
Step 6
Holding the Handy Stitch in place with the right hand, press on the power switch and begin sewing. Guide the fabric being sewing with the left hand.
Step 7
To end the sewing session, turn off the power. Turn the handwheel to raise the needle to the highest position. Carefully pull out about three inches of thread through the needle and snip, then lift the pressor foot to remove the fabric. Turn the fabric over and loop the needle threader through the last stitch. Place the end of thread from the underside through the eye of the needle threader, and pull to loop through. Pull to tighten and snip the end of the thread.
Video of the Day