
Cleaning Furnace Ducts: DIY or Contractor?

How dirty are your furnace ducts and is it a problem? If you hire a duct cleaning service, choose carefully. You can also do the necessary cleaning yourself.

Dust circulates through your forced-air heating system—you have only to look at the furnace filter when you change it to know the truth of this. The furnace filter traps a lot of the dust, but no doubt some of that dust clings to the interior of your ductwork, but how much? And is it a problem?
The U.S. Environmental Protection Agency’s position on cleaning furnace ducts is that it has no position. According to the EPA, studies do not conclusively demonstrate that dirty air ducts contribute to dust levels in homes or to health problems. Unless you find visible signs of mold in the ductwork, there is scant evidence that cleaning offers any significant benefit, and dealing with mold is a job for a professional. Still, many people rest easier if their ducts are cleaned of dust periodically.
Duct-Cleaning Services
With the right equipment, duct cleaning is relatively simple. The typical duct-cleaning service will arrive with rotary brushes and a long, flexible hose attached to a high-powered vacuum—not the sort of tools the average homeowner owns or wants to buy. The service person will gain access to the interior of the ducts through an end cap or by cutting an access hole in the ductwork. The rotary brush knocks loose any dust adhering to the sides and the vacuum hose removes it. You should expect the duct cleaner to also remove the covers of the air returns and supply registers and vacuum those out, as well as the blower compartment and fan of your furnace.
The comparatively low cost of equipment and limited training necessary for duct cleaning, plus the intangibility of the results, invites a greater-than-average number of questionable practitioners to join the trade. Be careful when choosing a duct cleaning service. Obtain a recommendation from someone knowledgeable that you trust, if possible. Here are some other tips from the EPA:
- Be wary of duct cleaners who make extravagant claims about the benefits—health or otherwise—of duct cleaning. Those claims have no proven basis.
- Duct cleaning is not a necessary part of routine heating and cooling system maintenance. Duct cleaners who claim otherwise are suspect.
- Ask for references and check them. Consult with your local Better Business Bureau to discover if any complaints have been filed against the company.
- Use of chemical treatments as part of duct cleaning is controversial at best and most likely unnecessary. The chemicals are promoted as mold growth inhibitors. Mold needs moisture to grow, however, and if you have moisture in your ductwork, you have other problems that need to be addressed.
- Some states require air duct cleaners to hold special licenses. Find out if your service provider is licensed in whatever manner is required.
- Before authorizing any work, get a written estimate of the cost and an itemized list of the services to be performed.
- Not all ductwork is bare metal; some is lined with fiberglass insulation and some is constructed from fiberglass duct board. Cleaning those requires special soft-bristled brushes and specific experience and/or training. Be certain your service provider has that experience and that training.

How to Clean Air Ducts Yourself
You can probably do all the air duct cleaning that’s really necessary yourself with a few basic tools and a good vacuum cleaner. A household vacuum with a hose you can direct into the ductwork behind the registers is adequate; a heavier-duty Shop Vac is even better.
Things You Will Need
- New furnace filter
- Vacuum
- Long-handled brush
- Rubber mallet
- Screwdriver
- Paper towels and tape, if necessary
- Start by closing all the supply registers (the ones that deliver heated or cooled air to the rooms). You want to push the dust and debris toward the furnace filter, not up into the rooms. If you cannot close the registers, lightly cover them with paper towels secured with tape.
- Check to make certain that there is an old furnace filter in place in the furnace to trap dust that is dislodged during cleaning.
- Turn on the furnace fan. This keeps the air moving and prevents loosened dust from settling again. If you can, set your thermostat to “fan on” and turn off the “heat/cool” option so that only the fan is running. If your thermostat doesn’t have the ability to turn off the heat/cool mode, you can proceed with the heat running.
- With the rubber mallet, tap sharply along the ductwork to dislodge debris or dust clinging to the insides.
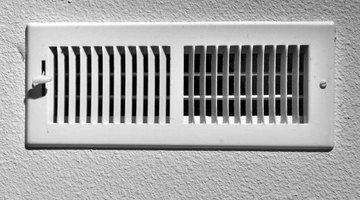
- Begin cleaning out the supply registers. Using the appropriate screwdriver, remove any screws affixing it to the wall or floor and lift the register off. Be ready with the vacuum cleaner to catch any loose dust that may be pushed out by the fan. Clean behind the register as far as you can reach with the vacuum hose. Repeat with the other registers.
- Clean out the air return registers. Take out any screws attaching them to the wall or floor and remove the register. Use the brush to loosen debris. Vacuum as far into the ductwork as you can reach with the hose.
- Turn off the fan at the thermostat. Turn off the furnace at the service switch near the furnace itself.
- With the power off, remove the panels over your furnace’s blower compartment and return air chamber. With your vacuum cleaner, clean out any dust build-up you find there. Clean the blower fan as well to keep dust out of the motor.
- Replace the furnace filter with a new one. If your old furnace filter wasn’t dirty before, it’s likely to be so now.
Use the money you save by cleaning your own ducts to bring in an HVAC technician for an annual furnace inspection. Not only will the technician clean out the heat exchanger and the blower, he will also check for carbon monoxide leaks and assure that your heating and air conditioning equipment is in good working order. This is money better spent that hiring someone to clean ducts.
References
More Articles