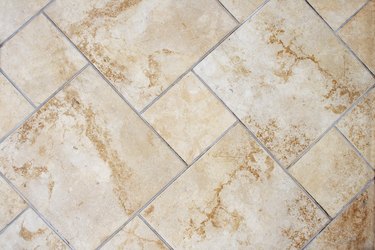
Ceramic tiles create beautiful designs on walls, floors and counters. And they offer low-maintenance options for these locations. You may not be ready to say goodbye to the familiar tile patterns when it comes time to remodel your bathroom or kitchen. With some care, you can remove the old tile and clean away old mortar so that you can reuse the familiar patterns in a new location.

Gear Up for Safety
Before you start any tile removal work, grab safety gear to prevent injury. Wear protective goggles when removing tiles, grout and mortar. Removal efforts can produce dust and small pieces of stone or tile that can easily damage your eyes. Wearing long sleeves and long pants can prevent scrapes and cuts. If you use any chemical products for removing mortar from the tile, keep the area well-ventilated to keep fumes out of your work space.
Video of the Day
Video of the Day
Chisel Out the Grout
Before you can remove the tile, you need to get rid of the grout that fills the gaps. This lets you get your tools under the edges of the tiles. Cut into the grout surrounding the tiles with a sharp utility knife. You can also use a putty knife and hammer to chisel away the grout. Or head to the home improvement store to get a grout remover tool to help chip away the grout. Remove all grout surrounding the tiles you wish to remove so that you have access to the edges of the tiles.
Remove the Tiles
With the edges exposed, you can carefully pry the tiles away from the wall or floor. Insert the putty knife under the edge of the first tile as low as it will go. Lower the handle so that the knife is as close to parallel with the floor as possible without cracking the tile. Use care in this step so you can keep the tiles whole and undamaged. Gently tap the back the knife with your handle to drive it under the tile. Continue until the tile pops free of its location. Pull or pry up the tile and set it aside. Continue removing tiles until you have all of them clear from the wall or floor.
Start Removing Mortar From Tile
With the tiles free from the wall or floor, you can now start cleaning them so can reuse the tile. Lay the tiles face down, and use the putty knife to scrape across the tile back, removing as much old mortar as possible. Be careful not to exert too much pressure downward on the tile, or you could cause it to crack.
You can also use products to help clean up the tiles. Soak a rag or sponge in mineral spirits or a similar solvent-based cleaner. Apply the solvent to the mortar on the back of the tiles. Allow two to three minutes for the solvent to begin to dissolve the mortar. Products such as Sakrete Concrete Mortar Dissolver can also help get rid of the mortar.
Scrape and soak the mortar from each tile until all mortar is removed. Rinse the back of each tile with a rag soaked in clean water to remove residual cleaner and prevent staining. Once the old mortar has been removed, you can apply new mortar at any time for reuse.
Reusing your old tile takes some work to safely remove and clean up the old ceramic pieces. But that effort is worth it when you see the results.