
DIY in a Day brings you step-by-step instructions for easy projects that will spruce up your space — within 24 hours (or less!).
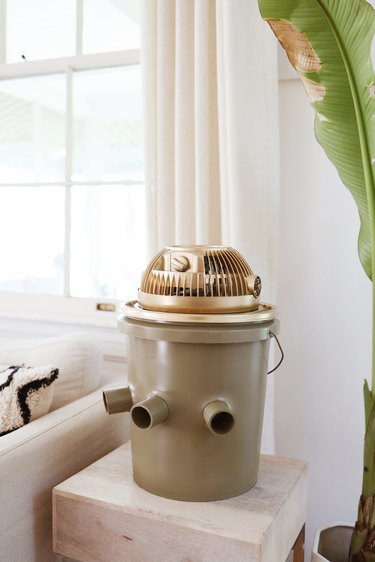
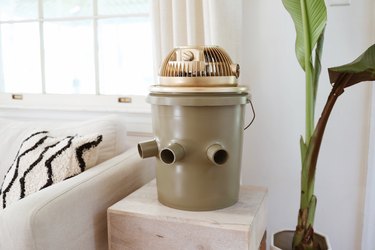
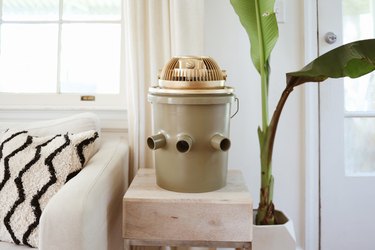
Nothing zaps your energy faster than a hot room on a hot day. If your abode lacks an air conditioner, this portable bucket AC will beat the heat without breaking the bank. Paint makes it pretty, and the handle makes it easy to move from room to room, so you can stay cool all summer long. Literally a bucket, a fan, a few pipes, and some ice, this DIY unit is both affordable and effective, and we guarantee it's the perfect solution to your heat wave woes.
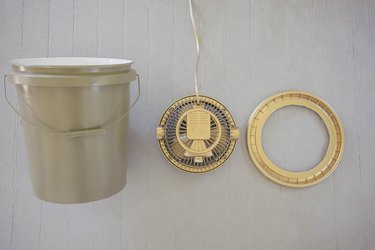
Things You'll Need
Spray paint (optional)
Frozen gallon of water in plastic jug
Video of the Day
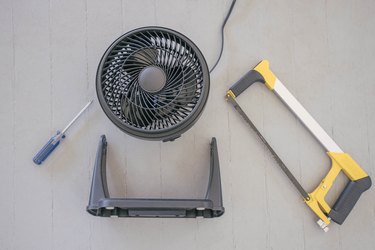
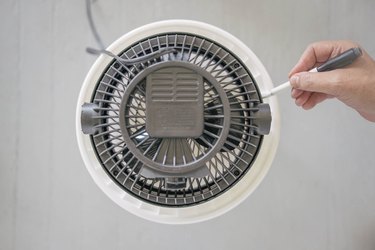
Step 1: Remove Stand From Fan
Remove the fan from its base stand. Some stands can simply be disassembled with a screw driver, but others might need to be cut off with a hacksaw.
Video of the Day
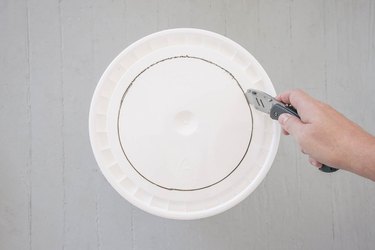
Step 2: Trace Fan on Lid
Place the fan face down on the bucket lid, and trace around the front rim of the fan.
Step 3: Cut Out Lid
Cut around the traced circle with a box cutter. If your lid is made of rigid plastic, it may be easier to cut your circle out with a jigsaw. In that case, you'd first need to make a starter hole by drilling into the lid, and then sliding your jigsaw blade into the hole.
Step 4: Place Liner in Bucket
Place the styrofoam bucket liner inside the plastic bucket.

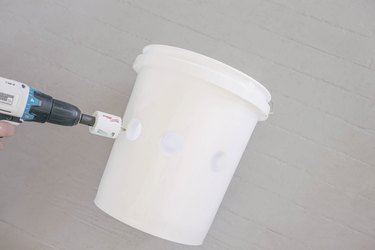
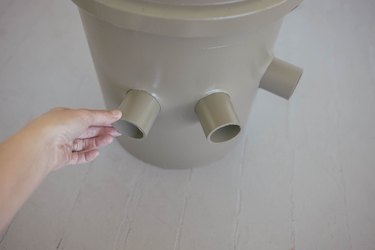
Step 5: Drill Holes Through Buckets
Use a hole saw to drill three evenly spaced holes in the front center of the bucket, about midway down. It may help to brace the bucket against a wall. Be sure to drill through both the plastic bucket and styrofoam bucket.
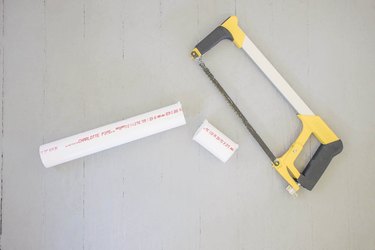
Step 6: Cut PVC Pipes
Use a hacksaw to cut three 3-inch pieces from the PVC pipe.
Step 7: Paint the Parts (Optional)
Place the various components of your AC on a drop cloth, and spray several light coats of paint until evenly coated. Let dry completely. We used a mossy green for the bucket and metallic gold for the fan and lid.
Step 8: Attach the Pipes
Slide the three PVC pipes through the holes you cut in the bucket. It should be a very snug fit, so you'll likely need to push firmly to get them through. But if they're loose for some reason, you can always hot glue them in place.
Step 9: Add the Ice
Place the frozen gallon of water inside the bucket.
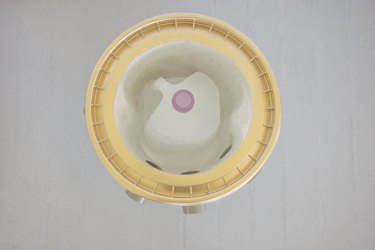
WARNING: Only use ice frozen within plastic containers inside your AC bucket to avoid risk of electrical shock. Never use loose ice or ice water.
Step 10: Attach the Fan
Place the plastic lid on the bucket, and then push the front rim of the fan through the hole in the lid.
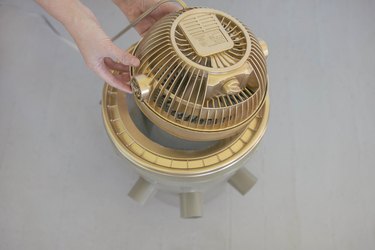
Plug the fan in, turn it on, and chill out to your snazzy new AC! It'll stay cool for several hours, so keep a spare gallon of water in the freezer to swap out when needed.