
How to Fix an Outside Faucet Leak

A leaky outdoor faucet does not impact your day-to-day household chores. Consequently, some homeowners are inclined to put off repairs to a later date. An unchecked leak will result in higher annual water bills.
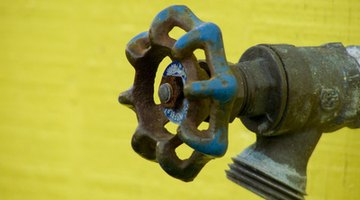
In addition, water dripping from a faucet on an outside wall will eventually rot wood and exacerbate basement damp problems. Repairing a leaky outdoor faucet is a chore that can be done in less than an hour with a few common tools.
Things You Will Need
- Adjustable wrench
- Plumber's teflon tape
- Monkey wrench
- Socket wrench or screwdriver
- Awl or a thin bladed screwdriver
- Graphite packing string or packing nut washer
- Phillips screwdriver
-
Tighten the packing nut situated below the faucet handle with an adjustable wrench if the stem is leaking. If this does not fix the problem, undo the packing nut completely and pull it along the stem away from the faucet body.
-
Wrap half a dozen turns of plumber's tape clockwise around the stem below the packing nut. Replace the nut and tighten it with the adjustable wrench. The additional plumber’s tape compressed against the stem should stop the leak immediately.
-
Locate the faucet shut-off valve if the water continues to drip from the spout. This is normally situated in the basement or in the crawl space adjacent to the outdoor faucet. Isolate the faucet by turning the shut-off valve handle clockwise.
-
Open the outside faucet completely by turning the handle counterclockwise. Clamp a monkey wrench around the faucet body where it connects to the side of the house. Place the adjustable wrench on the large valve-assembly nut between the packing nut and the spout. Brace the faucet body with the monkey wrench and turn the adjustable wrench counterclockwise to remove the valve assembly from the faucet casting.
-
Use a socket wrench or screwdriver to remove the faucet handle by undoing the nut or screw holding it in place. Unscrew the packing nut with the adjustable wrench and slide it off the stem. Strip off any Teflon tape you may have added previously. Use an awl or a thin-bladed screwdriver to pry either graphite packing string or a packing nut washer out of the packing nut recess.
-
Insert fresh graphite packing string or a new packing nut washer into the packing nut recess. Slide the packing nut back onto the stem and turn it clockwise until it is finger-tight. Place the faucet handle back on the stem and secure it by replacing and tightening the holding nut or screw.
-
Invert the valve assembly. Remove the compression washer screw with a Phillips screwdriver. Remove the worn compression washer from the valve assembly dished recess. Insert a new compression washer into the recess and press it down with the ball of your thumb. Insert the compression washer screw and tighten with the screwdriver.
-
Slide the valve assembly back into the faucet body. Start the threads of the valve-assembly nut by hand and tighten completely with the adjustable wrench while bracing the faucet body with the monkey wrench. Turn the faucet handle counterclockwise until it is fully open. Use the adjustable wrench to snug the packing nut down without over tightening.
-
Open the faucet isolating valve by turning the handle counterclockwise. Shut the faucet off and test for leaks by running your finger around the packing nut. If your finger comes away moist, snug the packing nut down slowly with the adjustable wrench until the leak stops. Tighten the packing nut an extra quarter turn to complete the job.
The Drip Cap
- A leaky outdoor faucet does not impact your day-to-day household chores.
- In addition, water dripping from a faucet on an outside wall will eventually rot wood and exacerbate basement damp problems.
- Open the outside faucet completely by turning the handle counterclockwise.
- Place the adjustable wrench on the large valve-assembly nut between the packing nut and the spout.
- Unscrew the packing nut with the adjustable wrench and slide it off the stem.
- Use an awl or a thin-bladed screwdriver to pry either graphite packing string or a packing nut washer out of the packing nut recess.
- Place the faucet handle back on the stem and secure it by replacing and tightening the holding nut or screw.
- Turn the faucet handle counterclockwise until it is fully open.
References
Writer Bio
After graduating from the University of the Witwatersrand and qualifying as an aircraft engineer, Ian Kelly joined a Kitchen remodeling company and qualified as a Certified Kitchen Designer (CKD). Kelly then established an organization specializing in home improvement, including repair and maintenance of household appliances, garden equipment and lawn mowers.
Photo Credits
- Exterior Plumbing 3 20080713-1210419 image by SIGNSofMIND from Fotolia.com
- Exterior Plumbing 3 20080713-1210419 image by SIGNSofMIND from Fotolia.com
More Articles