
Automotive battery charging circuits are designed to recharge and maintain a single battery. However, automobiles with custom audio systems, electric winches or other high-drain devices may require a second battery to power these devices.
One of the problems with connecting two batteries directly to an automotive charging system is that if one battery is weaker (provides less electrical current at the same voltage) than the other, the charging system may be taxed beyond its design parameters for providing power. This also has the undesirable consequence of draining the “good” battery to equalize the charge in both batteries.
One way to charge both batteries without overtaxing the charging system is by using a battery isolator. A battery isolator is constructed using two diodes, which act as one-way electrical check valves for the charging system.
- Solder-type lug terminals (3)
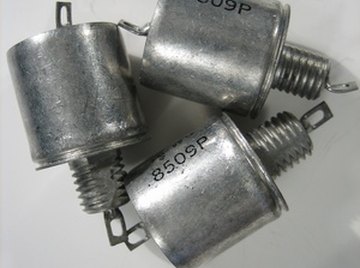
- High-current diodes (two; RF1501TF3S or equivalent – See “Resources”)
- Soldering iron
- Electronic solder
- Electrical wire (insulated copper, minimum 8 AWG thickness)
- Electrical pliers
- Permanent marker
When attaching this battery isolator to the charging system, connect the “A” lug terminal to the charging system (typically the “BAT” terminal on an automotive alternator). Attach the “1” lug terminal to the positive terminal on the first battery, and attach the “2” lug terminal to the positive terminal on the second battery.
The battery isolator will become very hot during use.
Cut three, 2-foot-long pieces of wire and strip one-half inch of insulation from each wire end.
Solder a lug terminal to one end of the first wire, and mark the side of the lug terminal with the letter “A.” Solder the free end of the first wire to the anode leads on both diodes.
Solder a lug terminal to one end of the second wire, and mark the side of the lug terminal with the number “1.” Solder the free end of this wire to the cathode lead on the first diode.
Solder a lug terminal to one end of the third wire, and mark the side of the lug terminal with the number “2.” Solder the free end of this wire to the cathode lead on the second diode.
Things You'll Need
Tips
Warnings
References
- “Electronic Devices”; Thomas Floyd; 1996
- Georgia State University: DC Power in Series and Parallel Circuits
Tips
- When attaching this battery isolator to the charging system, connect the “A” lug terminal to the charging system (typically the “BAT” terminal on an automotive alternator). Attach the “1” lug terminal to the positive terminal on the first battery, and attach the “2” lug terminal to the positive terminal on the second battery.
About the Author
David Sandoval holds a degree in microelectronics, and has several years of experience in the technology field. He has written articles for eHow, Answerbag, and wiseGEEK in the disciplines of chemistry, electronics, and physics.
Photo Credits
diodes image by Albert Lozano from Fotolia.com