
If you have wood countertops in your kitchen, they need sealing, or they'll be doomed to water spots, mold damage and possible warping caused by changing humidity conditions. Countertops are food preparation areas, so using the same type of sealers that you would use for other interior woodwork, such as tung oil or linseed oil, is problematic. A number of food-safe alternatives exist, however, so you shouldn't have trouble finding one that will work in your situation, and if you can't, you can always make your own.
The choice of sealer depends to a large degree on how you use your countertops. Cutting surfaces, such as butcher-block countertops, generally require a food-safe penetrating sealer, but you can seal wooden countertops that are outside the orbit of food preparation activities with a film finish that offers more protection. In all cases, sealing should be preceded by proper preparation of the wooden surface, which includes a thorough cleaning and sanding.
Video of the Day
Video of the Day
Finish Options for Wood Countertops
Any penetrating oil you use to seal butcher-block countertops and other cutting surfaces must be free of petroleum distillates and other toxins that could collect on knife blades and contaminate your food.
Mineral oil and walnut oil are the two most popular options, but the problem with them is that they don't harden in the wood, so they don't offer as much moisture protection as tung or linseed oil, and they won't do much to enhance the natural beauty of the wood. One way around this deficiency is to combine the oil with beeswax or butcher-block wax, both of which provide a better moisture seal than the oil itself and can be buffed to a glossy finish.
You have more options when finishing countertops that aren't used for chopping. Besides the oils and waxes you use for butcher blocks, such as Watco Butcher Block Oil & Finish, you can also use one of a number of commercial finishes, including film finishes like polyurethane. If you choose a film finish, stay away from water-based formulations because, as custom countertop manufacturer J. Aaron points out, they can be easily damaged by something as innocuous as a glass of water.

If you prefer a hardening oil finish that keeps the natural wood appearance of a butcher block but provides extra protection around the sink, where wood needs to be waterproof, J. Aaron recommends two-part Rubio Monocoat Oil. At about $150 per gallon, it's a little pricey, but it's a zero-VOC product that hardens in the wood and has no toxic ingredients listed on its material safety data sheet. It's worth the cost, especially considering you don't have to reapply it monthly as you do nonhardening oils.
How to Seal Wood Countertops
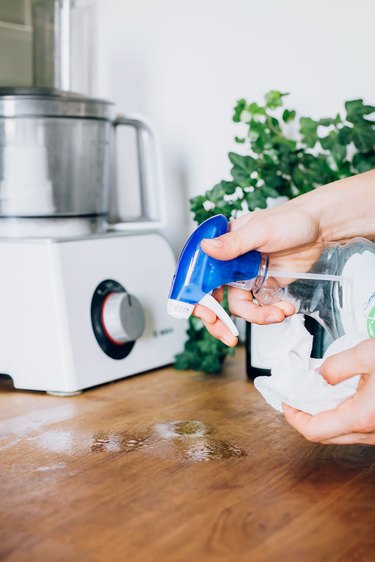
Step 1: Clean All Surfaces You Plan to Seal
Brand-new wood countertops don't need much cleaning, but those that have been in use for a while do because they have probably collected oils and other contaminants that interfere with whatever sealer you use. Begin cleaning by rubbing down the wood with acetone or a similar solvent to dissolve and remove these oils.
If any areas are discolored by mold, clean them thoroughly with a 50/50 solution of vinegar and water to which you've added a capful of dish detergent and then rinse well. Don't bother using bleach. It may change the color of the wood, and because of its high surface tension, it won't penetrate the wood grain and kill the mold spores.
Step 2: Sand the Wood
Sanding not only removes blemishes, discoloration and knife-blade marks but it also opens the pores of the wood so the sealer can penetrate, so it's a must even for new countertops. Use a sander with a square pad because triangular pads tend to dig small depressions into the solid wood that are noticeable after you apply the sealer.
The choice of sandpaper grits depends on how much damage you have to erase. Start with 150-grit paper and progress to 220- or 280-grit paper when damage is slight, but use 100- or 120-grit paper to sand out knife marks or other damage before progressing to finer grits. For the smoothest results, do the final sanding by hand, going with the grain, before removing all of the sanding dust with a tack cloth in preparation for sealing.
Step 3: Add Color if Desired
Any sealer you apply will darken the wood somewhat, but if you want to radically deepen the color or change the hue, you need to apply a stain, which you should do only if you plan to apply a film sealer such as polyurethane. Brush on a prestain conditioner first for more uniform color, especially if the wood is knotty or is a species notorious for accepting stain unevenly, such as birch.
Apply the stain by brush or with a rag. Give it about 10 minutes to penetrate and then rub off the excess with a second rag and wait several hours to give it time to dry.
Step 4: Apply the Sealer
Read and follow the application instructions on the container carefully if you're using a commercial sealer such as Rubio Monocoat Oil. If you choose this product, you'll only need one coat, but for most other sealers, you'll need at least two. Don't forget to seal the edge grain and, if possible, the underside of the countertop to prevent moisture incursion from underneath.
Apply penetrating oil with a rag, pouring it directly on the wood and rubbing it in. Apply the oil sparingly to avoid pooling on the surface. It's better to apply several thin coats than it is to apply one or two heavy coats and get uneven penetration.
Use a natural bristle paintbrush to apply oil-based polyurethane. Brush with the grain and use light, even strokes to avoid bubbles and streaks. Let the first coat dry, scuff the surface with 220-grit sandpaper, tack the countertop to remove dust and apply a second coat. Repeat with a third or more coats, if desired.
Step 5: Reapply Maintenance Coats
Update penetrating oil finishes such as mineral oil or walnut oil once every two months to keep the wood from drying out. Areas around the sink may need more frequent maintenance — perhaps every month — and should be kept dry by quickly wiping up spills whenever they occur.
Wooden countertops treated with Rubio Monocoat Oil or polyurethane need less-frequent maintenance. A reapplication every year is recommended, but you can extend this to two years or more by keeping the countertop clean and free of standing water and using pot holders.
How to Make an Oil and Beeswax Sealer
If you prefer to use all-natural ingredients to finish your natural-wood food-prep areas, you can make a sealer by mixing one part beeswax with three parts walnut oil, olive oil, coconut oil or mineral oil. You can even add essential oils to the mixture to add fragrance, although this addition would be more appropriate for a wooden bathroom counter than for a kitchen counter.
The procedure is simple:
- Place the beeswax in a pot and heat it on the stove until it melts. Beeswax is flammable, so don't overheat it. It should reach a maximum temperature of only 150 degrees Fahrenheit.
- Add the oil, which should also be warmed to prevent it from congealing, and stir until the two ingredients are thoroughly mixed.
- Stir in a few drops of scenting oil if desired and then remove the mixture from the stove and let it harden.
Apply the mixture directly to the wood with a rag and rub it in. The oil will penetrate while the wax leaves a protective film on the surface that you can buff to a glossy sheen with a lambswool pad.
- J. Aaron: Typical DIY Wood Countertop Mistakes to Avoid For The Weekend Warrior
- Rubio Monocoat: Rubio Monocoat Oil Plus 2C - Comp. A Safety Data Sheet
- J. Aaron: Choosing a Wood Countertop Sealer
- DIY Driftwood: Make Your Own Natural Beeswax Polish
- The Handmade Home: How to Seal & Stain Wooden Countertops