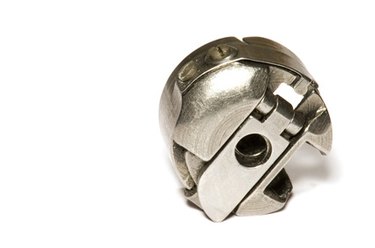
Singer has produced a popular line of sewing machines for more than a century. Isaac Singer was a contemporary of Elias Howe, the inventor of the sewing machine, and made improvements to the 1845 Howe invention with the up-and-down needle and the bobbin. Controlling the sewing machine's tension is important for quilting and creative sewing endeavors, and also for working with heavy or lightweight fabrics.
Step 1
Sew a seam on the diagonal on a doubled piece of fabric like the one you intend to sew. Pull the fabric on the diagonal to break the threads. For ideal tension, either both threads should break, or no threads should break. If only one thread breaks, adjust the bobbin tension and run this test again.
Video of the Day
Step 2
Remove the faceplate to open the area below the needle on the sewing machine. The faceplate snaps out to get into the bobbin. Remove the bobbin case and bobbin by lifting the hinged latch just as you would to wind a new bobbin. Leave the bobbin in the case so you can feel the tension as you make an adjustment.
Step 3
Place a small screwdriver on the head of the screw on the side of the bobbin case. Turn very slightly clockwise to increase the tension on the Singer bobbin. Turn slightly counterclockwise to decrease the bobbin tension. Holding the bobbin in the case, pull the bobbin thread and feel the tension, or how tight it is coming out of the case. If the thread is hard to pull out, the bobbin tension is probably too tight. If the bobbin will not stay in the case, the tension is probably too loose.
Step 4
Place the bobbin case back in the Singer sewing machine and return the faceplate into position. Make another sample on the doubled fabric swatch by sewing on the diagonal. Look at the top side and see if the stitching runs along the top. Check the underside and see if the stitches look like they are on top of the surface, or if they lock in the center. Pull the fabric on the diagonal and see which thread breaks. Adjust the bobbin tension again with the use of a small screwdriver, adjusting only the screw on the side of the bobbin case. Adjust the tension so that the threads are locking in the center of the fabric and one does not break when pulling the stitched fabric on the diagonal.
Video of the Day