
Starflamedia/iStock/Getty Images
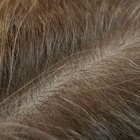
Backcombing is the most widely used method for making dreadlocks. The process takes several hours and varies depending on the length, thickness and texture of your hair. At least 4 inches of hair is needed. Asking a few people to help you will save time and make the process less tiring. Backcombing works on most hair types, though thick or oily hair will be the most difficult to work with, as it will slide more easily out of the knots that form the dreadlocks.
Wash your hair with dreadlock shampoo, starting two weeks before you put the dreadlocks in, if possible. Do not use conditioner. Make sure your hair is completely dry before starting your dreadlocks.
Section your hair into 1- to 2-inch-square sections depending on how thick you want your dreadlocks to be. If you want a side part, start with a row down the center of your head, if you want a middle part, make two rows starting from the middle part. Continue sectioning your entire head; hold the sectioned hair in place with clips or rubber bands.
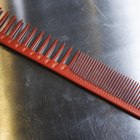
Remove the rubber band from one section and start backcombing. Start at least 1 inch from the scalp, use your dread comb to comb the section of hair towards your head. Move the comb up about 2 inches and repeat. As you backcomb, rotate the hair you are holding from side to side to help create a circular shape as the dreadlock forms.
Place a rubber band at the tip of the dreadlock and another rubber band a half an inch from the base of your scalp, to help the dread stay in place. Don't place the band too tightly or too close to the scalp, as it can cause soreness; however, the band at the tip should be fairly tight.
Repeat Steps 3 and 4 on each section of hair. Take a break every 25 to 30 minutes to prevent neck and back pain, as well as soreness in your hands.
Apply dread wax starting half an inch from the base of each dread. Use a pea-sized amount for every 3 inches; rub the wax between your fingers to warm it up and work it into the dread, rolling the hair between your fingers until it is gone. After the full strand is waxed, roll the dread between your palms for 30 seconds.
Continue this process with each dread. If your dreads feel too waxy, you can finish by using a hairdryer over your whole head for a few minutes to melt the wax into your hair.
Wash your dreadlocks every two to three days, and rub new growth against your scalp in a circular motion to help form new knots at the roots. A sculpting hook can be used to pull loose hair back into the dreadlocks. Palm roll each dread for 30 seconds. Hooking and palm rolling every day will help your dreadlocks mature faster. After your dreads mature, they will require less maintenance.
Related Articles

How to Keep New Dreads Tight

How to Make Thin Dreads

How to Pin Curl Short Hair
How to Do Temporary Dreads

How to Remove Dreadlocks Without ...
How to Do a Tight French Braid

How to Use Velcro Rollers So They Don't ...

How to Do Micro Braids Yourself for Free

How to Unlock Dreads
How to Do a Beehive Braid Style for a ...

How to Stretch Out Curls
How to Do a Root Perm for Hair
How to Backcomb Synthetic Hair
How to Do Two Strand Twists With ...

How to Dreadlock Thin Straight Hair
How to Do a Quick Weave Ponytail

Removal of Buildup in Dreadlocks

How to Dreadlock a Beard

How to Get the Look of Dreads Without ...

How to Unlock Dreadlocks
References
Writer Bio
Chelsea Armstrong is a professional makeup artist and stylist. Her love of writing began while she was studying English at the University of Waterloo. Armstrong later attended the Sonia Ryan Makeup Academy and now owns and operates her own business.
Photo Credits
Starflamedia/iStock/Getty Images