If you've recently had a baby shower, chances are you've received some very useful and heartfelt gifts from friends and loved ones. Correct etiquette suggests sending thank you notes to these individuals to show your appreciation. Etiquette also dictates the correct etiquette for addressing, wording and mailing baby shower thank you cards.
Recipients
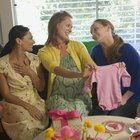
Even though you've probably thanked everyone in person and opened the gifts in front of the givers, it is still in step with etiquette to send thank you notes to the guests who bought gifts for you and/or your unborn baby. If some guests have attended the event, but did not bring gifts, thanking them verbally for coming is sufficient. It is also appropriate to send a note of thanks, as well as a small gift to the host of the baby shower, to show appreciation for the host's efforts in organizing the event and inviting guests.
What to Say
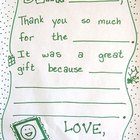
It is best to specifically talk about the gift that was received in the thank you note. Generic notes give the impression that the recipient is not generally happy with the gift. For instance, notes should say things like, "Thank you so much for the stroller. I'm sure the baby and i will enjoy taking walks with it!" or "The set of blankets you purchased for the baby are beautiful. I can't wait to rock him/her to sleep in them." The expectant mother should also include her desire to have the gift giver share in the joy that comes with a new baby, and should express her sincere appreciation for the gift giver's friendship.
Who Writes the Note
In most cases, the expectant mother, who was the guest of honor at the baby shower, should write all thank you notes. If a gift that the entire family can benefit from, such as kitchen appliances or new furniture, was given at the baby shower, the guest of honor should still write the note, but all family members who will use the gift should sign the note as well. The mother may also choose to sign her thank you notes on behalf of the baby when the gifts are exclusively for the child.
Timing
Baby shower thank you notes should be sent out as soon as possible, preferably before the birth of the baby. If the expectant mother has not sent the notes to shower guests before she delivers the child, it is acceptable to give out thank you notes up to two months after the baby is born, according to Emily Post. However, Post also suggests that this is an ideal window of time, and individual circumstances may call for thank you notes to be sent out later than two months.
Being Creative
It is appropriate for expectant mothers to include creative elements in their thank you notes. Photos that depict the guest of honor opening her gifts, or a picture of the baby's ultrasound can be sent along with the thank you notes to further express the joy and anticipation of the baby's arrival. If the thank you notes are sent after the child's birth, pictures of the baby using his/her gifts, for example, the baby wrapped in a blanket that was purchased by a shower guest, will make the thank you note even more sentimental.
Related Articles
When to Send a Thank You Note

Etiquette for a Thank You Note for One ...

Who Traditionally Pays for a Baby Shower

Baby Shower Gift Card Ideas

What to Write in a Bridal Shower Card

Etiquette for Thank You Notes After a ...
What Is the Purpose of a Wedding Shower?
How to Buy From a Baby Gift Registry
How Much Money Should I Give as a ...

How to Ask for Shower Donations

Sample Wording for Bridal Shower Thank ...
How to Plan a Baby Shower
Wording for an Unknown Gender Baby ...

Couples Shower Etiquette

Second Wedding Gift Etiquette

How to Word Thank You Cards After a ...

How Long Should a Baby Shower Last?

Does the Mother of the Groom Get ...
How to Write a Gracious Thank-You Note

Wedding Gift Check Etiquette
References
Writer Bio
Tamiya King has been writing for over a decade, particularly in the areas of poetry and short stories. She also has extensive experience writing SEO and alternative health articles, and has written published interviews and other pieces for the "Atlanta Tribune" and Jolt Marketing. She possesses a Bachelor of Arts in English and is currently pursuing higher education to become a creative writing professor.
Photo Credits
baby image by Dron from Fotolia.com