
How to Wire a 3 Phase Motor Starter

Three-phase electric motors use three different electric legs with a 1/3-cycle lag between them. To use three-phase electricity, a motor needs windings spaced 120 degrees apart. A three-phase motor's large size and high starting torque usually limit its use to industrial settings.
The motor's starter wires directly to the motor's wire terminals. Motor starters have a set of contactors. When the motor's switch is turned on, voltage flows through the contactor's coil, creating a magnetic field. This magnetic field pulls on the contactor's points, allowing electricity to flow to the motor's windings.
Things You Will Need
- 3-phase motor
- 3-phase motor starter
- 3-phase disconnect box
- Switch
- Flat-head screwdriver
-
Inspect the three-phase motor's wiring diagram. Identify the motor's terminals. The terminals will be labeled "T1," T2" and "T3."
-
Examine the starter's wiring diagram and identify its wires. The starter will have wires labeled "T1," "T2," "T3," "L1," L2," "L3" and two switch wires labeled "S1" and "S2."
-
Inspect the three-phase power supply disconnect box. The disconnect box will have terminals labeled "L1," "L2" and "L3." A three-phase disconnect box acts like a large circuit breaker. Verify that the disconnect box has its switch in the "Off" position.
-
Examine the switch's wire terminals. In some cases, the wire terminals will have labels. If not, then the switch has interchangeable wire terminals.
-
Insert the starter's switch wires into the switch's wire terminals and tighten the terminal screws with a flat head screwdriver. If the switch has identification tags, place the correct starter wire into each switch terminal, labeled "S1" and "S2." Often the switch operates on a low-voltage signal with interchangeable wire connections.
-
Push the starter's "T" terminal wires into the three-phase motor's "T" terminals and tighten the terminal screws with the flat head screwdriver. Verify that the "T1" wire connects to the "T1" terminal, the "T2" wire connects to the "T2" terminal, and the "T3" wire connects to the "T3" terminal. These wires are not interchangeable.
-
Push the starter's "L" wires into the disconnect box's "L" terminals and tighten the terminal screws with the flat head screwdriver. Verify that the "L1" wire connects to the "L1" terminal, the "L2" wire connects to the "L2" terminal, and the "L3" wire connects to the "L3" terminal. These wires are also not interchangeable.
The Drip Cap
- Three-phase electric motors use three different electric legs with a 1/3-cycle lag between them.
- Inspect the three-phase motor's wiring diagram.
- The disconnect box will have terminals labeled "L1," "L2" and "L3." Push the starter's "T" terminal wires into the three-phase motor's "T" terminals and tighten the terminal screws with the flat head screwdriver.
- Verify that the "T1" wire connects to the "T1" terminal, the "T2" wire connects to the "T2" terminal, and the "T3" wire connects to the "T3" terminal.
- These wires are also not interchangeable.
References
Writer Bio
Based out of Central Florida, Robert Sylvus has been writing how-to and outdoor sports articles for various online publications since 2008. Sylvus has been a home improvement contractor since 1992. He is a certified HVAC universal technician.
Photo Credits
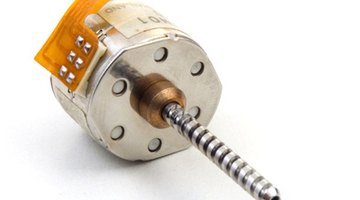
- motor.jpg image by Aussiebloke from Fotolia.com
- motor.jpg image by Aussiebloke from Fotolia.com
More Articles