
How Does a Hand Planer Work?

Hand planers work essentially the same as a cheese slicer--by scraping off a thin surface layer of the wood. This is done so that a piece of wood may become thinner, flatter or smoother. There are many types and designs of hand planes, most of which are made of wood or cast iron.
What a Hand Plane Does
They give the woodworker or craftsman a certain measure of control. Modern hand planes can also be electrically powered.
How a Plane Works
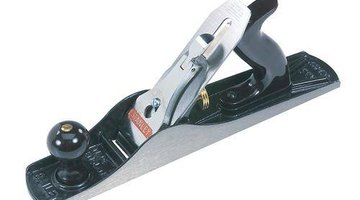
Hand planers are built so that the sharp metal scraping blade is attached to a wood frame and stays sturdy and affixed at the same angle. This angle can be changed and set by the woodworker prior to use so that a thinner or thicker layer is taken off with each pass over the wood's surface. The flat bottom of the plane ensures that when gliding it over a piece of wood, it shaves off only the highest points that may or may not be noticeable to the human eye. The thin wood shavings curl out of the mouth of the plane or the opening on the other side of the angled blade. In this way, after several repeated strokes, the wood becomes level and smooth.
How a Plane Works Best
Most planes are pushed away from the body to shave off the wood, but Japanese planes are pulled towards the body. Most hand planes have a handle on the back and a knob on the front for the woodworker to hold on to while pushing the plane. This creates stable and steady passes along the wood. The grain of the wood is also an important aspect to consider when using a hand planer. Some woods have sporadic grains, and it may be hard to avoid going against the grain in some spots, causing minor splintering. But in general, going as much with the grain as possible creates the smoothest piece of wood.
Resources
Photo Credits
- Photo courtesy of Stanley Hand Tools
- Photo courtesy of Stanley Hand Tools
More Articles