
How to Apply Polyurethane to Pine Logs for Seating

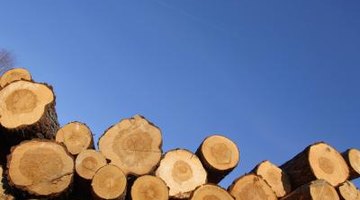
Pine logs for seats can be a practical, economical use of that pine tree you cut down. You will need to brush on something to help protect the wood. By finishing your log seat with a coat of polyurethane, you will not only protect the wood, but the polyurethane will bring out the depth in the wood. Polyurethane gives the wood a gentle amber color, which enhances the beauty of the wood grain. Oil-based polyurethane makes the wood harder by coating the surface so it is resistant to stains and moisture. A finish that is smooth and blemish-free is attainable with just a little preparation work.
Step 1
Sand the surface of your pine log seats. Start with 100-grit sandpaper on a hand-held disc sander. Vacuum or brush the dust off by using a rag or an old paintbrush. Change the sandpaper to 150-grit sandpaper and sand the surface again, removing the dust when you are finished. Switch the sandpaper again to 220-grit and sand the pine seat one final time. Remove the dust with a vacuum or shop vac that has a soft brush attachment on the end.
Step 2
Pour some mineral spirits onto a soft, lint-free cloth and wipe the wood down. Do one final wipe-down with a tack cloth. This will help to ensure that the surface is free from dust.
Step 3
Combine one part mineral spirits to two parts oil-based polyurethane. Gently mix the two ingredients together. Be careful when mixing, so you do not get air bubbles in the mixture.
Step 4
Use a natural-bristle paintbrush, and load up the brush with the mixture. Use even strokes, going from end to end. Overlap the brush strokes, completely coating the surface. If the polyurethane drips, simply smooth it with your brush.
Step 5
Allow the polyurethane to dry before applying the seal coat. Brushing on the top coat needs to be done within 24 hours of applying the first coat of diluted oil-based polyurethane.
Step 6
Apply the polyurethane right out of the can. This must be done carefully so you do not get air bubbles in the polyurethane. Dip your brush in, but do not wipe the brush against the side of the can. Apply with long strokes, going in the direction of the wood grain. Overlap the brush strokes for an even coating.
Step 7
Wait five minutes, then inspect the wood for any drips. Smooth any drips or runs you find with your brush.
Step 8
Let the finish dry for 24 hours. Check the wood again for any runs, drips, or bugs that may have settled on the log's surface. If you find some, use a razor blade to cut these areas away. Be careful to not cut into the wood. Small blemishes can be smoothed away by sanding with 400-grit sandpaper. Dip the sandpaper in water first and use a circular stroke to remove the blemish. Sand only until the blemish is gone. Do not go so deep that you hit the wood below.
Step 9
Brush on the last coat of polyurethane straight from the can. This needs to be done within 48 hours of the previous coat.
References
Warnings
- Do not drop or shake the can of polyurethane. This will make air bubbles which will be transferred to the surface you are coating. If you do drop it, leave it alone for a half hour or so, to be rid of any bubbles.
- Apply the polyurethane in an area that is free from wind and dust particles. Particles could easily get blown onto the wet polyurethane and stick to the surface.
Writer Bio
Gail Delaney is a writer in South Dakota and has articles published online at various websites. She is the garden editor for BellaOnline, with years of gardening experience. Being the caretaker of her parents led her in the direction of medical issues, especially natural remedies.
Photo Credits
- Hemera Technologies/AbleStock.com/Getty Images
More Articles