Things You'll Need
Straight pins
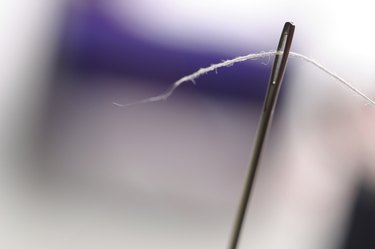
Needle
Thread matching wool
100 percent wool yarn
Felting needle tool
Felting sponge
Scissors
Felted wool occurs when 100 percent wool fabric has been shrunk, causing the fibers to swell and adhere together. The end result is a very strong fabric that will not unravel. Repairing felted wool can be handled in many ways, two of which are repair by stitching and repair by patching. Stitching beneath the blemish is by far the easiest. Repairing by patching can be done one of two ways: a patch can cover the blemish entirely or the patch can be felted into the wool. The latter patching is more complicated.
Stitching
Step 1
Place the underside of the felted wool facing you. Place a felting sponge beneath the tear. Align the jagged edges of the tear. Place straight pins into the wool to hold the edges in position.
Video of the Day
Step 2
Thread a needle with thread that matches the color of the wool. Using a needle, pick up the fibers on the right edge of the tear by inserting the needle into the felted wool, and pull the thread over the tear, inserting the needle into the wool fibers on the left edge of the tear.
Step 3
Continue sewing as you would mend any fabric. Don't insert the needle too deeply into the wool or it will be visible on the outside.
Patching
Step 1
Turn the felted wool inside out or place the underside of the felted wool facing you. Place a felting sponge beneath the hole. Smooth the hole so that the felted wool fabric is lying as smooth as possible with no wrinkling or bunching.
Step 2
Thread the needle with 100 percent wool yarn and pick up the fibers of left edge of the hole with the needle, by inserting the needle just under the surface fibers, cross over the hole horizontally, and pick up the fibers of the right edge of the hole. Do this for the entire horizontal edges of the hole.
Step 3
Thread the needle with 100 percent wool yarn and pick up the fibers of the top of the hole with the needle, sewing back and forth vertically, so that the mending resembles a checkerboard of back and forth lines of yarn. Do this until you've covered the hole.
Step 4
Stitch with the needle with the 100 percent yarn, from the outside edge of the hole, in a circular pattern like the bottom of a basket, around and around until you reach the "center" of the hole, which was air in a hole, but has been criss-crossed over with the yarn.
Step 5
Punch vigorously, with your felting needle tool, the entire sewn yarn patch covering the hole. Push the felting needle tool firmly into the felting sponge. Each push of the multi-needle tool grabs the fibers of the 100 percent yarn and blends them into one another, locking the wool of the yarn into the wool of the felted wool you are repairing. Continue felting the wool patch until the yarn resembles the texture of the felted wool.
Video of the Day