You can build a self-powered car science project with objects such as a mouse trap or a balloon. Self-propelled cars are an example of physics, demonstrating kinetic energy. Children can create these simple but effective projects with objects around the home. These projects can be for science class or for fun, to race them or to see how far they can go.
Rubber Band Car
Get one sheet of card stock, two binder clips, one plastic straw, two quarter-inch faucet washers and a rubber band. Grab two 8-inch long dowels for axles, two pencils and four old CDs or drink coasters painted black for wheels.
Fold card stock in half, open it back up and fold paper in one time on each side towards the middle fold. Refold so that is forms a rectangle and put tape around each side to hold together. Cut out a notch in the center of one long end of the card stock. The notch should be 2 inches wide and 1 ½ inches deep. Cut the straw into half and cut one half into another half. Tape underneath the car at each end horizontally and insert the dowels through the straws as axles. Glue each washer against each hole of the CDs. Affix the end of the dowels to the washers and CDs with hot glue or poster putty so that they are all affixed and move together as wheels. Glue full-sized pencils on each side of the top of the car lengthwise to strengthen the vehicle. Clip one small binder clip on one end, and take out the tab of the binder clip by pushing in both ends. Insert one end of rubber band through the tab and put the ends back into binder clip. Where the notch is at the opposite end, clip a binder clip to the exposed axle. Put the other end of the rubber band through the tab of the second clip. Wind up the wheels and the rubber band by turning the wheels backward enough times so that the rubber band is tight. Let it go and watch your car race as the rubber band unwinds.
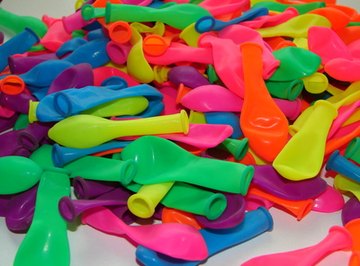
Balloon-Powered Car
Grab some duct tape, a balloon, scissors, a playing card, two pairs of wheels on axles from a toy car, one straw and a thumb tack.
Fold the card in thirds. Poke holes through each side of card to insert both sets of axles through and put wheels back on each end like a car. The wheels should be big enough that the card doesn't touch the floor. Cut the straw in half and tape the halves next to each other. Put the two straws in the balloon opening and duct tape the end so that it will be airtight. Tape the balloon to the end of the straws. Cut a square hole in the middle of the top of the car. Insert the straw and balloon through the hole lengthwise of the car so that the balloon is sticking out the top of the car. Tape the other end of the straws underneath the top of the car so that the straw ends are sticking out for you to blow up the balloon. Blow up the balloon and let the car go.
Mousetrap Car
Buy a mousetrap, four eye hooks, six balloons, two pens, two pop can tops or washers, fishing line and four old CDs.
Take out the ink cartridges of the pens so the pen cases are empty. Cut the top and bottom off of two balloons to put around two of the CDs that will be the back wheels; this will give them some traction. Make a hole in the center of one of the pens. Thread the string through the top and out the end of one of the pens. Tie a knot through the end that is coming out through the side of the pen. Put the two eye hooks on each end of the mouse trap; you may want to use a drill so that you won't crack the mousetrap. Put the pen without the string through one of the eye hooks to use an axle at the front of the mousetrap where the flap is.
Wrap the balloon around one end of the pen. Slide one of the CDs without the broken balloon on it, on top of the balloon and pen so it fits snugly. Do the same on the other side of the pen. Put the pen with the string in it through the eyelets on the back of the mousetrap. Tie the string to the flap of the mousetrap that snaps when the trap is sprung. Wrap the balloons around edge of pen and place a CD over each side, just like the front. Place your car on the floor and pull backwards until the string pulls and starts to catch. Lift the flap and keep turning until the trap starts to load and it's pulled all the way back. Set the trap according to the mouse trap directions on the package. Tap the trap trigger and watch the car soar.
References
About the Author
Based in Calgary, Alberta, Kelly Smith has been writing since 1997. Her articles have appeared in the "Daily Hampshire Gazette" newspaper, "Artscene" Sedona, Larson Newspapers publications, "Electronic News" and Independent Newspapers publications in Arizona. She holds a Bachelor of Arts in journalism from the University of Massachusetts, Amherst.
Photo Credits
Balloons image by Lori Pagel from Fotolia.com