
How to Haul Wood Utility Poles

Wood utility poles can be used for holding up electric or telephone wires, supporting exterior lighting or building pole barns. Their size can present some special problems with getting them to the work site, particularly if you have a limited workforce. Safety is also a consideration, due to the size and weight of the poles. Planning and good equipment can solve the problem of loading and getting the poles to the place where they will be used.
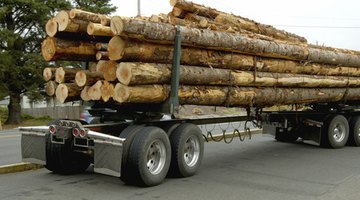
Loading Poles
Step 1
Check traffic laws in your area before loading poles. If the poles are exceptionally long, you may need a permit to haul them. In some areas, you may need a spotter car in front of the load, and another one behind.
Step 2
Position the truck or trailer with the bed parallel to the pole.
Step 3
Slide two long logging chains under the log using levers and wedges to lift the pole slightly. Fasten one end of the chain to the side of the truck or trailer bed opposite the one where the pole is located. The chain will now stretch across the bed and under the pole.
Step 4
Attach a come-along pulley to a large tree or other immovable object on the side of the trailer that is away from the pole.
Step 5
Link the loose ends of the logging chains that are under the log together, and attach them to the come-along's pulling cable.
Step 6
Slowly crank the come-along pulley cable in, pulling up the chains toward the truck or flatbed trailer. As the pulley reels in, the chains will pick up the log and pull it up onto the truck bed.
Securing the Poles
Step 1
Add upright poles at the corners of the flat bed to help keep the pole from rolling off.
Step 2
Secure poles, using tie-down cables, to the long sides of the bed.
Step 3
Loop a bight of cable or use chain or cable mesh to secure the ends of the pole so that it will not shoot forward into the cab of the vehicle or slide off the back into traffic.
Step 4
Attach a large orange security flag or a white rag if the pole sticks out from the back of the vehicle. This will help motorists see the pole and keep them from running into it.
References
- William K. Mooney, Carpenter and Handyman
- Environmental Literacy Council: Wood Utility Pole Life Cycle
Resources
Writer Bio
Daisy Peasblossom Fernchild has been writing for over 50 years. Her first online publication was a poem entitled "Safe," published in 2008. Her articles specialize in animals, handcrafts and sustainable living. Fernchild has a Bachelor of Science in education and a Master of Arts in library science.
Photo Credits
- log truck 2 image by Jim Parkin from Fotolia.com
More Articles