Though it has become more popular over the last decade to download music through digital storefronts like iTunes or stream music directly to a device via apps like Spotify or Pandora, many people still maintain physical collections of music on CDs. However, as CD players and optical disk drives become less and less common on computers and other devices, it has become increasingly necessary to transfer the contents of CDs to hard drives, smart devices and similar storage mediums. While it is not always possible to transfer a CD to a USB memory stick directly, as a result of anti-piracy measures on certain discs, if you'd like to move tracks from CDs to an MP3 player, or pass them along to a friend, it is possible to copy music from a CD to a USB flash drive by using one of a few simple methods.
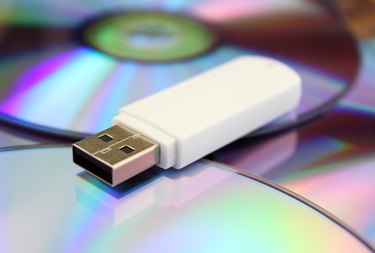
Transferring Songs to Flash Drives
Video of the Day
In many situations, transferring songs from a CD to a flash drive is as simple as dragging and dropping files. To begin, insert both the disc and a flash drive of your choice into your computer. Windows Explorer should open to display the files available on both storage mediums – if not, simply navigate to the files in two different windows. If your CD does not have an anti-piracy measure preventing it, you will then be able to select the music files on the CD and drag them to your USB drive's storage. Once the files have copied over, you can use the MP3s as you wish.
Video of the Day
Windows Media Player: Rip CD Option
Unfortunately, not all CDs allow users to drag and drop files. Especially prevalent on discs produced and released in the early 2000s, anti-piracy measures prevent users from simply transferring audio files from disc to computer. In these situations, you will need to use a program to rip the audio files from the CD. The Windows Media Player "Rip CD" function is one of the easiest ways to accomplish this.
With the CD inserted into your computer, open Windows Media Player. Navigate to the CD in the left panel, then click the downward arrow under the "Rip" panel at the top of the screen. Click "More Options" to access the CD ripping settings. In this menu, you will be able to select the location where you wish to send ripped music files, as well as your desired audio format and quality settings. Select "Apply" and "OK," then click the "Rip" panel. Using the checkboxes on the screen, select the audio tracks you wish to transfer, then click the "Start Rip" button in the lower right corner to begin the process. If you've set Windows Media Player to rip songs to your flash drive, the files will appear there automatically. Otherwise, once the process has completed you will be able to navigate to the location of the files, then drag and drop them into your flash drive as you would any other file.
Macs and iTunes: Importing Songs
On an Apple computer – which will often require the use of an external disc drive – audio tracks can be transferred in a similar manner by using iTunes. To do this, insert your CD and open iTunes. Select the CD icon near the top left corner of the window if iTunes doesn't open an information screen automatically. You can then select "Import All Songs" to add the tracks to your iTunes library. Depending on your iTunes preferences, these songs will then be available in your "iTunes Media" folder for easy transfer to your flash drive.
If your iTunes isn't set to copy files to this folder automatically, navigate to "Edit" then "Preferences" in the iTunes menu, then click the "Advanced" tab. Select the options to keep the iTunes Media folder organized and to copy files to iTunes Media folder when adding to library. Click "OK," then navigate to "File," "Library," and finally "Organize Library" in the iTunes menu. Select the option to consolidate files, then click "OK." iTunes may need time to sync, but your library will become available for copying in your "iTunes Media" folder.