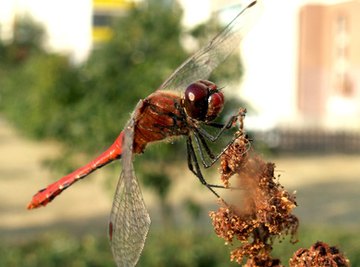
Dragonflies are beautiful and relatively common. There are two basic methods for pinning dragonflies. Depending on which method you choose, you will view your specimen from the top, its wings extended in a "T," or you will view its left side up, the wings together at the side. Both methods are standard, and entomologists use them depending on the side of the dragonfly's wings they want displayed. A dragonfly's wings are the most important part of the specimen because that is the part entomologists use to identify the specimen.
Preparation
Place your live dragonfly in an airtight plastic container and place it in the freezer for at least 24 hours. You may also kill it in a kill jar. A kill jar is an airtight container, usually glass like a canning jar, with plaster of paris poured in the bottom and let to dry. Once the plaster has dried, place a cotton ball containing a killing agent, such as nail-polish remover, in the kill jar with your live specimen. Leave your specimen in the kill jar at least 10 hours. While the freezer method takes longer, it takes less specialized equipment and is nice for the spur-of-the-moment collector.
Rehydrate your specimen by placing it in an airtight container with a wet cotton ball. You only need to do this if you are starting with a dead, brittle specimen instead of a live one. Do not let the specimen get wet or touch the water directly. Leave the specimen in the container for at least 36 hours. If it is not movable yet, leave it in longer.
Clear your pinning surface of dust and other objects. Your surface may be either a butterfly pinning board or a piece of Styrofoam. You can buy spreading boards for as little as $2. However, you can use a piece of Styrofoam to achieve the same results. Make sure your Styrofoam has a center groove about 1/2 inch wide and about 1/4 to 1/2 inch deep.
Cut small strips or tabs out of wax paper. Their size depends on the size of the dragonfly, but they should be around 1 1/2 inches to 2 inches long and 3/4 inch to 1 inch wide: longer than the height of both wings on either side of the dragonfly.
Prepare your display case to receive your finished specimen. Your display case should be airtight, or at least lidded, to keep other pests from destroying your pinned specimen.
Pinning Method 1

Gently pierce your dead but not yet dry dragonfly with your insect pin (size 1,2 or 3, with 3 being the largest) perpendicularly through the back in the middle between the front set of wings as you view your dragonfly from the top. You may have to gently move the wings out of the way to do this. Leave enough pin above the specimen to be able to grasp the pin without touching the specimen, about 1/2 inch.
Place insect pin in the center groove or well of the spreading board. Push the insect pin far enough into the Styrofoam or spreading board so that the dragonfly's wings are even with the higher sides of the spreading board.
Brace the body of the specimen without piercing it again using straight or dressmaker pins. (These straight pins are not designed to pin insects; do not pierce your specimen with them.) If you want the legs in a certain position, use the pins to position them now. Brace the tail of the specimen so the dragonfly does not move or swivel.
Take one of your wax paper strips and slide it between the wings on the left and the wings on the right. Holding the wax paper firmly on both sides, gently push the wings down toward the edge. If you have not braced your specimen properly, it will tip and swivel. If it does this, remove the wax paper and brace your specimen more. You want your wings to dry parallel to the pinning surface, so don't be afraid to let the wings sit on the spreading board. Pin the paper down into the spreading board being careful not to harm or pierce the wings. Repeat on the opposite side.
Nudge the wings into position so the wings on the left are even with the wings on the right. Dry the specimen for at least 3 days and up to a week in a dry place safe from bugs. (Some bugs eat dead bugs, destroying insect collections.) When the specimen is dry, remove bracing pins and wax paper. Unpin your specimen from the spreading board on its insect pin and place it in its display case.
Pinning Method 2

Place your specimen left side up on a piece of Styrofoam. With an insect pin, pierce the dragonfly between the first set of wings and the first and second set of legs so the pin is perpendicular to the dragonfly body. This method does not require a spreading board, but you view your finished specimen with its left side up so that may effect which pinning method you decide to use.
Leave enough of the insect pin above the specimen so you can grasp the pin without touching the specimen: at least 1/4 inch. The right side of the specimen should be pressed gently against your pinning surface.
Create a scaffolding out of straight pins to position the body parts as desired. In this method of pinning, do not position the wings unless it's to make them even. However, position the legs and head as desired using the straight pins to brace and position.
Dry your specimen for at least three days and up to a week in a dry place safe from bugs. When your specimen is dry, remove the brace pins. Remove your specimen on your insect pin and place it in a display case.
Labels
- Airtight plastic container or kill jar
- Cotton ball, optional
- Butterfly spreading board (recommended) or Styrofoam
- Wax paper
- Display case with lid, optional but recommended
- Insect or specimen pins, size 1, 2 or 3
- Straight or dressmaker pins
- Location and ID labels, optional
- Field Guide for identification, optional
If you want to display your dragonfly without a pin, do not pin through your specimen. Instead, use bracing pins around the dragonfly and wax paper to achieve the desired look and let your specimen dry. Do not try to remove the insect pin once your specimen has dried on it. You will probably break your dragonfly trying to remove the pin.
If using a kill jar, be cautious of evaporating alcohol or killing agent. It can cause light-headedness and headaches if inhaled in a non-ventilated place. Always keep kill jars in a well-ventilated area.
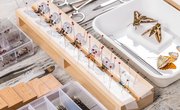
Type labels in 4 point Arial font and cut them as small as possible. Place the label below the specimen on the same pin so you can read the label when pinned. Let the label float just above the pinning surface. For personal use, labels are optional, but professional collections require location labels.
Use this format to create location labels:
Country, state/province, county Location: water source (especially for dragonflies), park, nearest city. Latitude/longitude/geo-location, and elevation (this line optional) Date, collector’s name
Identify your specimen using field guides available at your library. Field guides will have the common names as well as the scientific names of common types of specimens in your area.
Use this format for ID labels:
Genus, species (or order, family) det (for insect labels means “as identified by”) name of identifier, year identified.
Identification labels are usually not required for professional collections but might be of interest.
Things You'll Need
Tips
Warnings
References
- Encyclopedia of Insects, Second Edition, Vincent H. Resh, 2009
- Study of Insects, 7th edition,Triplehorn and Johnson, 2005
- A Field Guide to Insects, Borror and White, 1970
Resources
About the Author
Writing since 1999, Ruth Jensen has experience with cooking, baking, insect rearing, and crafting, and looks forward to writing articles for eHow.com. In 2007 she placed in the Healthy Marriage short story contest for her story "Growing Back Together Again." Jensen graduated from Brigham Young University with a Bachelor of Arts in English.
Photo Credits
dragonfly image by Henryk Olszewski from Fotolia.com