Things You'll Need
Construction paper
Pencil
Ruler
Scissors
Glue
Markers

Pop-up birthday cards are a simple, portable way to add a special touch to birthdays. You can design a custom birthday card with a pop-up cake and handwritten greeting. Cards can be made with standard craft supplies like glue and colored construction paper. Your handmade pop-up card will surely stand out from the mass-produced store bought variety.
Step 1
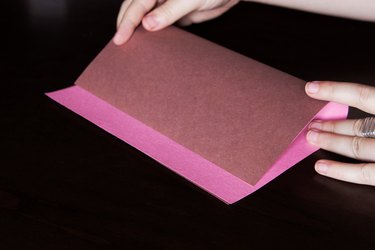
Place two pieces of construction paper on top of each other. With the edges matching, fold in half, short sides together. The first piece of construction paper, or card layer Z, will be the outside of your pop-up birthday card. The second piece of construction paper, or card layer Y, will be the inside layer of your pop-up birthday card. Set aside card layer Z.
Video of the Day
Step 2
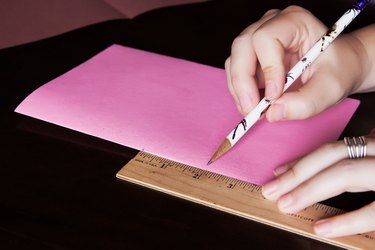
Place card layer Y on your work surface, with the folded edge to the left. From the center of the folded edge, measure 2 inches up and 2 inches down from the center mark, along the folded edge.
Step 3

At each mark, draw a line at a right angle to the folded edge of card layer Y. Draw each line 2 inches long. Cut each line.
Step 4
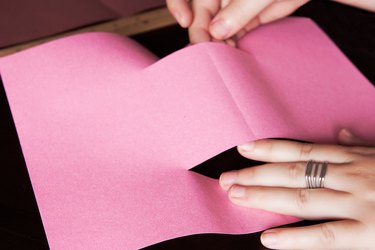
Open up card layer Y. This is the inside of your pop-up birthday card. Slide your finger into each cut and push up the section of construction paper between the 2 cuts. This is the pop-up base of the inside of your pop-up birthday card.
Step 5

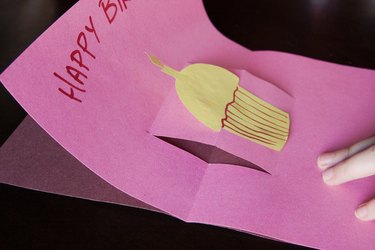
Refold the pop-up base of card layer Y so it is folded toward the right, or inside card layer Y. Close card layer Y with the folded edge to your left and the pop-up base folded to your right. The pop-up base will look like a stair-step inside the card.
Step 6
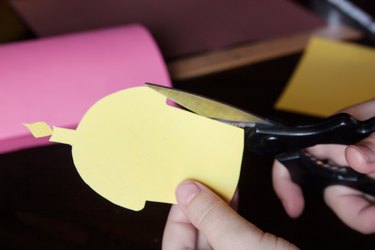
Draw a birthday cake on construction paper and cut it out. Fold the paper birthday cake in half, vertically. When your pop-up birthday card is closed, the construction paper cake will be folded along the folded edge of the pop-up base. Place the birthday cake on the pop-up base of the card and close card layer Y.
Step 7

Open card layer Y. Check to make sure you are happy with the look of the cake when the card is opened. If any edges of the birthday cake stick out of card layer Y, cut the cake smaller until it fits inside card layer Y.
Step 8
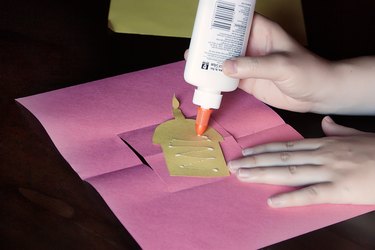
Glue the birthday cake to the pop-up base of card layer Y. Open and close the card to make sure it has the look you want.
Step 9
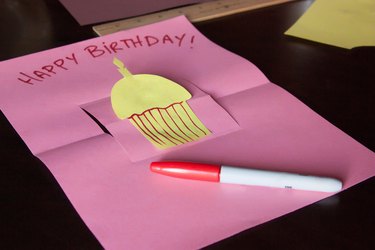
Write your birthday wishes inside card layer Y, and add craft trim or other decorative effects.
Step 10

Place card layer Z on your work surface, with the folded edge to your left. This is the front of your pop-up birthday card. Draw your birthday greeting on the front of card layer Z and add craft trim or other decorative effects.
Step 11
Place card layer Z on your work surface, with the folded edge to your left. Open card layer Z. Place card layer Y, with the folded edge to the left, on top of card layer Z. Open card layer Y. Match the edges of card layer Z and card layer Y.
Step 12
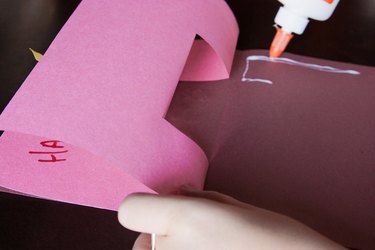
Glue the layers together. Avoid getting glue inside the pop-up section of card layer Y. Leave your pop-up birthday card open until the glue is dry. When the glue is dry, open and close your pop-up birthday card, checking to make sure each item is securely glued.
Video of the Day