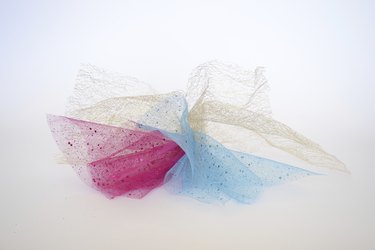
When decorating for a wedding or reception, many brides and grooms choose to use tulle bows to add a touch of class and glamour to pews, chairs or benches. You only need a few supplies to make wedding bows from tulle, and you can customize them to match your wedding colors or theme.
Things You'll Need
Video of the Day
- Roll of tulle approximately 6" wide
- Sharp scissors
- Tape measure
- Large piece of cardboard
- 4 straight pins
- Plastic pew clip or wire/pipe cleaner (optional)
Video of the Day
Determining Tulle Bow Size
Before you begin making a tulle bow, you must decide how large you would like your bow to be. For a bow that will be 12 inches in diameter, measure and mark 12 inches on your piece of cardboard. Next, decide on a length for the tail of your bow -- the pieces that hang down at the bottom of the bow. Cut a section of tulle that is twice the length of your desired tail, and set aside.
Assembling the Tulle Bow
Place one end of the role of tulle along the side of your cardboard piece, and pin both corners down. Gently stretch the tulle until it reaches the line that you have marked; fold the tulle back toward the opposite side (like an accordion), and pin the corners down. Continue this folding process until you have at least five "loops" on each side. Remember to remove the pins, fold down a new piece of tulle, and replace the pins to hold the tulle in place each time you create a new loop.
Once you have an even number of loops on each side, cut the tulle in a straight line matching the edge of the loops. Use a measuring tape to find the midpoint of the loops, and mark lightly with a pencil. Take your previously cut tail piece, and tie it in a straight knot around the marked center so that the two ends of tulle are hanging down.
Finishing the Tulle Bow
Remove the four pins holding the tulle loops. Using your fingers, gently fluff out the pieces of tulle to create a finished bow. Remember that tulle will hold the shape that it is stretched into and can be easily ripped, so work carefully to create the finished product.
Transporting Tulle Bows
Tulle can be easily crumpled and wrinkled. Once it has been misshapen, it is virtually impossible to return tulle to its original form. For this reason, do not place or transport your tulle bows in bags, boxes or containers. Tulle bows should be hung by their tails and transported very carefully.
Customizing Tulle Bows
You can customize tulle bows by adding additional decorations, such as flowers, bows, ribbons, feathers or other ornaments. Attach them to the center of your tulle bow using thin wire or a dab of glue. If you'd like to hang your bows from pews, chairs or benches, you can purchase pew clips or use a piece of wire or pipe cleaner attached to the back of the center knot.