Greenboard is the generic name given to a form of drywall that’s manufactured to be moisture-resistant. Although it does stand up to moisture in the air better than regular drywall does, it’s not totally waterproof and shouldn’t be used in shower stalls. It’s good for the rest of the bathroom. Greenboard has a waxy surface that makes it difficult to get tiles to adhere to it. One solution is to coat it first in a layer of Kilz or other flat sealing primer, which will stick to the board while providing a suitable surface to hold the tile.
Step 1
Cover the greenboard wall in a layer of flat sealing primer, rolling it on as you would a coat of paint. Let it dry for 24 hours.
Video of the Day
Step 2
Draw a level horizontal line along the bottom of the greenboard wall with your pencil and level. Make the line as far from the floor as the height of a tile plus 1/4 inch. For example, if the tiles are 4 inches tall, then the line should be 4 1/4 inches off the floor.
Step 3
Find and mark the middle of the horizontal line. Draw a vertical line from floor to ceiling at that point.
Step 4
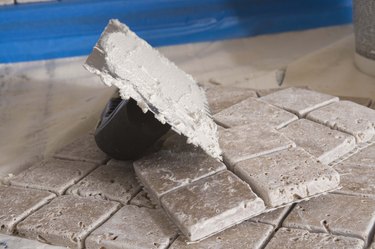
Cover the bottom of the wall with tile adhesive, spreading it on with a tiling trowel. Cover the whole length of the wall, from the floor up high enough to cover the horizontal line. The notches in the trowel create a combed pattern that will allow you to see the lines through the mortar.
Step 5
Press the bottom row of tiles in place under the horizontal line, starting on either side of the vertical line. Put spacers between the tiles as you hang them. Build out from the middle toward the edges of the wall, with the top edge of each tile even with the horizontal line (which should leave 1/4 inch of space below each tile). Use a tile cutter to cut the tiles at the ends.
Step 6
Apply more adhesive to the wall above the bottom row of tiles and starting working your way up, row by row. Start each row at the center line, building out to the sides. Tile the whole wall.
Step 7
Allow the tiles to set overnight. Remove the spacers.
Step 8
Spread grout over the wall starting at the top and working your way down, using a grout float to press the grout into the spaces between the tiles. Use the long edge of the float to scrape the grout off the tile face. Wipe the tile down with a damp sponge to take up the residual grout. Let it set for two to three days.
Video of the Day