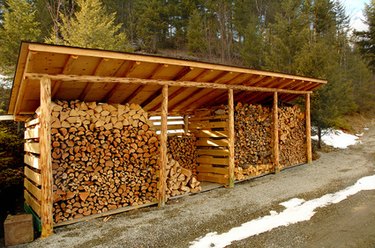
For the homeowner who works with wood and lumber all the time, a wood storage rack serves multiple purposes. It keeps lumber, plywood and other types of wood organized with easy access. The top shelf of the wood storage rack serves as a place for green wood to age and dry out for use later. Build the wood storage rack with treated lumber for outdoor storage. The construction with open shelves allows easy access and a complete view of the lumber stored.
Step 1
Place the six pieces of 4-by-4-by-96-inch posts on a worktable. Measure from one end of the lumber and make marks at 30, 60 and 90 inches.
Video of the Day
Step 2
Next, put the eight pieces of 2-by-6-by-96-inch lumber on the worktable. Lay them parallel to each other with the long edges touching. Measure from the left end of the lumber and make marks every 16 inches. Put the framing square on the marks and draw a line across the width of the lumber.
Step 3
Center the joist hangers on the marks and secure them to the 2-by-6-by-96-inch lumber with 4-penny box nails. Drive the nails at a slant to prevent them from protruding through the other side of the lumber. Separate two of the six pieces of 4-by-4-by-96-inch posts about 96 inches apart and set a third one about mid-way.
Step 4
Place one of the eight pieces of 2-by-6-by-96-inch lumber on the bottom of the 4-by-4-by-96-inch posts with the joist hangers facing down, one on the 30-inch mark as well as the 60 and 90-inch marks. Secure them to the posts with the 16-penny nails. One post should be even with the ends of the 2-by-6-inch lumber and one about mid-way. Repeat this with the remaining posts and 2-by-6-by-96-inch lumber.
Step 5
Turn one of the assemblies over so the joist hangers are facing up. Secure one piece of 2-by-6-by-30-inch lumber to both ends of each of the 2-by-6-by-96-inch lumber (the 30-inch lumber is sticking up) with the 16-penny nails.
Step 6
Stand this assembly upright. Stand the other assembly upright so the 2-by-6-by-96-inch pieces with the joist hangers on them meet the 2-by-6-by-30-inch lumber. Secure them to each other with 16-penny nails.
Step 7
Lay one of the 20 pieces of 2-by-6-by-27-inch lumber in each of the joist hangers. Secure them to the joist hangers with 4-penny box nails.
Video of the Day