
How to Repair a Drain on a Utility Laundry Sink

Utility sinks in laundry rooms follow the same basic design as kitchen and bathroom sinks. The drain connects to a trap shaped like a "P" or "S," which connects to the main drain pipe. A leaky drain in the utility sink implies a damaged seal or trap. Working on drain pipes is simple and often does not require any tools. An adjustable pipe wrench can assist with tight slip nuts and retaining nuts. The hardest part of the job is identifying the location of the leak.
-
Position a bucket beneath the trap, and loosen the slip nuts on each side of the trap. Allow standing water to drain out into the bucket.
-
Push the slip nuts out of the way and remove the trap. Inspect the trap for damage. Signs of damage include cracks or holes in the pipe or damaged threads. Replace as necessary.
-
Loosen the retaining nut at the connection of the drain to the sink. An adjustable pipe wrench easily loosens the nut. Unscrew the nut fully and remove it. Press the drain up to loosen it. Remove the drain from above the sink.
-
Pull the existing rubber gasket from the sink drain. The gasket connects to the visible aspect of the drain and the surface of the sink. The most common source of leaks is a damaged gasket.
-
Roll some plumber's putty into a long strip about 1/4-inch thick. Make sure the strip is long enough to go around the drain hole. Lightly press the putty into place around the drain hole making sure to pinch the ends together. Drop the drain through the hole so that the visible aspect is sitting on the putty.
-
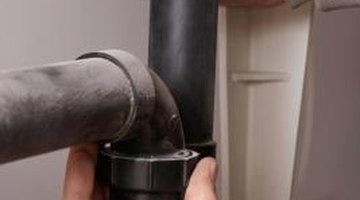
Reassemble the drain. Attach the retaining nut and tighten down the drain. Remove any plumber's putty that squeezes out. Slide the slip nuts onto the drain pipe and attach the trap. Tighten down the slip nuts. Make sure the drain pipe inserts into the trap 1 or 2 inches.
Check out this related video from Homesteady on Youtube.
References
- "Lowes: Complete Home Improvement and Repair"; Don Vandervoort, 2005
Tips
- The trap and the rubber gasket on the drain are the only two aspects of a sink's drain that will leak. The main pipe could be damaged. Contact a professional to replace a main drain pipe. The faucet handles can also develop leaks that appear to be coming from the drain. Use paper towels held against the base of the faucet handles or the drain to properly identify the location of the leak.
Photo Credits
- Jupiterimages/Photos.com/Getty Images
More Articles