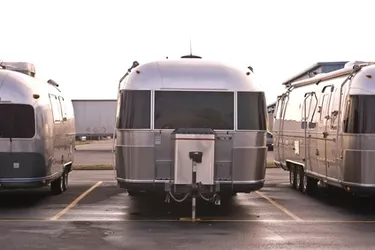
Constructing an RV garage requires attention to detail, since a flimsy structure can be easily dismantled by strong winds. It's always best to attach the RV garage to concrete flooring. Secure the basic garage building or carport structure to flooring with appropriate bolts or metal hardware to stabilize it on all sides. Using lightweight metal or plywood to build the garage is perfectly fine, but the unit should be secured at all joints and seams with angle-iron and stainless steel screws or bolts. Simply nailing a stucture into place is too risky, since wind can easily move under a tall roof made for the RV.
Step 1
Go online to review RV garage styles. Use a sketch pad to design a preferred garage shape. Create a design with an A-frame roof, sloping roof or hip roof. Consider how to move the trailer or bus-type RV into the covered area, so build it tall enough for ample room. Allow plenty of room in the construction design to drive the RV straight into the garage, or allow room to back a towed RV into the garage with a car or truck.
Video of the Day
Step 2
Create the final design before obtaining a building permit. Review local building codes to make sure the garage has an acceptable design for the neighborhood.
Measure off space to construct a concrete slab to fit the garage. Install a framed lumber box around the entire perimeter using 2-inch by 6-inch boards. Use 15 of these boards, each 8-feet in length, for a 20-feet x 40-feet slab. Shovel out a six-inch deep lawn area down to bare, flat soil. Connect the boards end-to-end, by toe-nailing them (driving a nail at a 45-degree angle through one board into the next one). Drive 10-inch wooden stakes on the outside of the framed box to secure the sides for the concrete pour. Roll out metal gridwork to add strength to the slab and then call the concrete delivery truck.
Step 3
Use 2-inch by 6-inch boards of pressure-treated lumber to construct side framing and roof trusses that will fit over the RV space. Purchase metal brackets to build each single truss unit from short sections of lumber nailed together. Build support posts at the corner from 8-inch by 8-inch post materials. Get other people to help you lift and nail roof trusses into place. Stand the trusses up, propped up to form the roof once all other framing is secured to the slab. Cover the roof with exterior-grade plywood and metal sheeting. Use sheets of aluminum or steel secured by 4-inch stainless steel screws.
Step 4
Add exterior siding to the walls of the RV garage after using L-shaped angle iron hardware to secure side posts and interior framing in all places. Use an electric screwdriver to place screws into the angle iron sections. Build in all of the sides and back of the garage with metal or faux wood siding, if budget permits.
Step 5
Cover the structure with less side covering to form a carport versus a garage. Install siding that reaches from the roof area down about 4 feet, wrapping the very top on three sides. Leave the drive-in side open from ground to ceiling. Paint or stain posts or wood exposed to the elements. Add trim, caulk gaps and paint the siding. Install siding reaching to the ground on three sides later to turn the carport garage into a garage, as your budget permits.
Tip
Ask a carpenter to help you design and build roof trusses. Trusses are constructed of small sections of wood nailed in a zig-zag pattern and held together by metal brackets at all seams. If the RV garage will be extremely wide, about 20 feet, have trusses span the size of the space. Center support posts are not needed with trusses this size.
Things You'll Need
Sketch pad
Building permit
Concrete slab for garage
Exterior-grade plywood sheets
2-inch by 6-inch boards
8-inch by 8-inch post material
Hardware for making trusses
Sheets of aluminum or steel
4-inch stainless steel screws
Electric screwdriver
L-shaped angle-iron hardware
Paint
Stain
Electrician
Warning
Avoid attaching a cheap RV garage to your home. This will lower the home's market value. Place the garage in the backyard, if possible, so it will not show from curbside.
If you have doubts about wind and the stability of the structure, ask for guidance from local RV enthusiasts about how to add metal wiring or ropes to hold the structure in place.
Video of the Day