Few things dampen your holiday season more than a string of dead lights, but a quick DIY repair may be easier than you think. In the old days, if a whole string of lights went out, the problem could be traced to a single bulb, and your job was to find the bad lightbulb in your tangled mess of Christmas decorations. Newer lights typically are wired differently, and the whole string (or at least half the string) won't go out just because one bulb is bad.
If the light display won't come on at all — whether in your outdoor Christmas lights, wreaths, or interior incandescent light strands — chances are there's a break in one of the wires. Unplug the lights and look for damage in any of the wires. If you find a break or exposed metal wiring, you can cut out the damaged portion and splice the wire back together with a device called a crimp-on butt connector, which is an insulated metal cylinder that you crimp onto the wire ends with combination-type wire strippers.
Video of the Day
Here's a step-by-step guide on how to fix Christmas lights with a crimp-on butt connector:
Things You'll Need
1. Unplug the Lights
Make sure the light string is unplugged at both ends before you attempt to splice holiday lights. Place a piece of masking tape on each wire on either side of the damaged portion you are cutting away, about 2 inches on either side of the damage. This will leave you with two pieces of tape on each wire strand — most Christmas lights have two strands, but some have three or more.
2. Label the Tape Pieces
Label the two pieces of tape on one strand "A" with a permanent marker, then label both pieces of tape on the next strand "B," then continue the pattern for each additional strand. This will ensure you connect the proper strands back together in the splice.
3. Cut Out the Damage
Cut out the damaged portion of your Christmas tree light wires using the wire cutter on the combination tool, taking away about an inch of wire on either side of the damage to ensure you are working with good wire for the splice, but leaving the portion you taped.
4. Choose the Connectors
Select a crimp-on butt connector, also called a barrel connector, for each wire in the string of Christmas lights. These connectors look like tubes with slightly larger ends than centers. They come in different sizes, so choose one that matches the gauge of your Christmas tree light wire, which will most likely be between 18 and 22 gauge.
5. Measure the Barrel
Measure the thinner portion of the connector's barrel, then divide that length in half. Use the wire strippers to remove that length of insulation from the end of the wire you will be splicing. This allows the thicker portion of the connector to house insulated wire while the active (thinner) part of the connector houses the exposed wire, keeping the bare portion away from contact.
6. Crimp the Connector
Place one end of one of your wires into one end of a connector, then place the connector and wire into the appropriate groove of the combination tool. Squeeze the tool's handles together to crimp the connector tightly onto the wire.
7. Connect the Wires
Place the other wire with the same label in the other end of the connector, and crimp it tight with the tool.
8. Wrap the Splice
Pull firmly on both ends of the wire to ensure they are secure in the crimp. If not, start the process over with a new connector. Once the connection is secure, tightly wrap the connection in electrical tape, stretching the tape as you wrap it around the wires. This will not hold the wires into the connector if the crimp is not secure, but it can reduce strain on the wires from movement and prevent debris from working its way into the crimp. Electrical tape comes in a variety of colors, so match the wire color as closely as possible for a less obtrusive splice.
9. Splice the Remaining Wires
Repeat the crimping and taping process for each wire to splice the light string. Plug the light strand in to test.
Tip
Tired of dealing with broken strings of Christmas lights? Try upgrading your holiday display to LED lights — these last, on average, about 10 times longer than traditional incandescent bulbs.
Need to see the crimping process visually? Check out this full video tutorial from Todd's Garage:
My Lights Won't Come On, But There's No Wire Damage
If your lights won't come on and you can't find damage in the wiring, the light string could have a blown fuse. Luckily, it's simple to fix your set of lights:
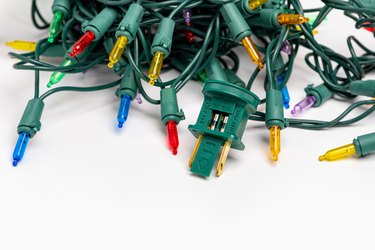
- Examine the male plug end of the string; if there's a little door that says "Open," use your fingernail or a small screwdriver to slide the door open to expose two tiny fuses.
- Replace each fuse one at a time, and check the lights with each one.
- Light strings often come with spare fuses, or you can borrow a fuse from another string of the same type of lights (the replacement fuses must be the same size as the originals).