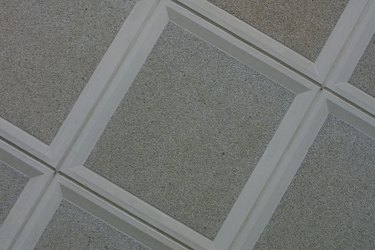
Acoustical tile installation can make an old, cracked, uneven ceiling look like new again. While it's available in a variety of sizes, 12X12 ceiling tile is a size that works in any size room but is especially adaptable to small spaces. There are many styles and textures of ceiling tiles to choose from today. Instead of using the plain, original white, you can now create a look with your ceiling. While the majority of ceiling tiles on the market offer tongue and groove construction, there are some that offer a seamless look from squared edges. No matter the style, a do-it-yourselfer can install acoustical tile with a minimum of tools.
Step 1
Plan the tile layout. Any tiles that need cutting should be around the outer edges of the room. Set the tiles in the room at least 24 hours before you start so they can acclimate to the room's temperature.
Video of the Day
Step 2
Find the ceiling joists with the stud finder. Look for the joists to repeat every 16 or 24 inches. Mark the location of the joists with chalk.
Step 3
Attach the first furring strip next to the wall that runs at a right angle to the joists. Use one 8-penny nail in each joist. Attach the second row of furring strips the distance measured for your narrow row of cut tiles. Remaining rows of furring strips should be 12 inches apart. You need to measure frequently to make sure the lines of furring strips are straight and parallel with each other. Check also that the ceiling height remains level. If necessary, add shims between the furring strips and the ceiling. When you reach the far side of the ceiling, run a row of furring strips against the wall.
Step 4
Cut a corner tile to the proper size using a utility knife and a straight edge. If the border tiles aren't the same size for the length of the room as the width, take that into consideration as you cut the corner tile. Remove the side without the tongue.
Step 5
Put three staples in the portion of the flange that sets flush against the furring strip. Place one staple in the flanged edge that doesn't. Slide a border piece into position. Staple it. Set a piece from the other border that extends from the corner and attach it. Work your way diagonally across the room to the opposite corner from where you started. Use nails close to the wall to hold border tiles that don't have flanges.
Step 6
Attach wood trim to the outer perimeter of the room. This also gives the border tiles more support, especially those that didn't have flanges.
Video of the Day