
Dimmer switches have come a long way since 1961, when Joel Spira invented the first electronic dimmer switch. Modern dimmer switches can save energy and light bulbs, but they are damaged more easily than the auto-transformers and rheostats that had been used to dim lights before Spira's invention. Electronic dimmer switches are solid-state devices. They can be damaged by power surges or when the homeowner exceeds the wattage load the dimmer is rated to control. Fortunately, troubleshooting and replacing electronic dimmer switches is relatively easy, even for the novice.
Bench-Testing a Dimmer Switch
Video of the Day
Step 1
Place the dimmer switch on a nonconducting surface, such as a dry, wooden workbench or a rubber mat, to prevent potential shock hazard. Attach one lead of the 110-volt test cord to one of the dimmer switch's black wires.
Video of the Day
Step 2
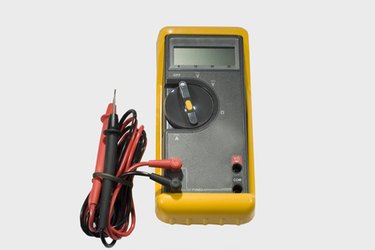
Turn the function switch on your DMM to the AC voltage position. If your DMM is a manually ranging meter, set the range selector switch to the 150-volt range. Set your DMM for 150 volts or higher. If you select a range that is too low for the voltage you are testing, you will see "O.L." on the Liquid Crystal Display (LCD). Set the range selector to a higher voltage range.
Step 3
Attach one of the DMM's test leads to the second black wire on the dimmer switch. Attach the second test lead to the second 110-volt test cord lead. Position the test leads so they are not touching one another or the metal strap of the dimmer switch, then plug the test cord into a 110-volt outlet.
Step 4
Operate the dimmer switch while watching the reading on the DMM's LCD. The reading should vary linearly from zero to 120 volts and from 120 to zero volts if the dimmer switch is functioning properly. A continuous "zero" volts reading indicates a burned-out dimmer switch, and you need to replace it.
Testing An Installed Dimmer Switch
Step 1
Go to the service panel and turn off the circuit breaker protecting the branch circuit you will be working on.
Step 2
Remove the two screws securing the cover plate at the dimmer switch. Remove the two screws holding the dimmer switch in the device box and pull the switch from the box.
Step 3
Remove the nuts connecting the black wires on the dimmer switch to the black circuit wires. Connect the two sets of black wires together with the alligator-clip-equipped jumper wire. Make sure the alligator clips do not touch the bare ground wire or the metal device box.
Step 4
Go to the switch box and flip the circuit breaker for the branch circuit back on. If the light comes on, the dimmer switch is burned out and you need to replace it.
Step 5
Turn the circuit breaker off again before installing a new dimmer switch.