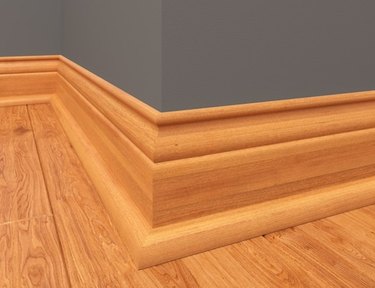
Quarter-round molding has multiple uses in home improvement projects. It's often added to the bottom of baseboard to hide the gap between the baseboard and the floor, and it's also a common addition to door and window casings. Outside the house, builders often use it to hide the gap between the top of the siding and soffit, sometimes wrapping it around the inside of the soffit to the edge of the eave.
Walls, window and door casings, and soffits all have corners, so you have to know how to cut angles in quarter-round, and while that isn't difficult, it can be tricky. Most pros make these cuts on compound miter saws, but you can also do the job with a miter box and a hand saw. Either way, it's important to hold the molding steady while cutting because even a slight movement can cause chipping and can ruin the cut.
Video of the Day
Video of the Day
Here's how to cut quarter-round molding with a miter saw.
Measure and Cut Accurately
The old adage "measure twice, cut once" is especially important when cutting quarter-round. As trim, it's always going to be visible, and gaps caused by miscalculations will be obvious even if you fill them. To prevent gaps, it's not a bad idea to add 1/16 inch to every measurement to ensure you don't cut too short. You can always shave down a piece that's too long, but one that's too short is usually a throwaway.
Don't forget to take the width of the blade into account. After you measure and make a mark, you'll want to line up the mark with the side of the blade that faces the piece you want to keep. You don't want the blade to cut through the mark, or the piece will be too short. Ideally, it should cut right next to the mark, and if you do this accurately, some part of the mark will still be visible after the cut.
Cutting 45-Degree Angles
Because most structures are square and have 90-degree corners, you usually have to cut 45-degree angles on pieces of quarter-round trim that meet in corners. To do this accurately, you have to hold the trim against the saw fence in the same orientation it will be sitting when installed.
Trim for baseboard sits on the floor, so you can orient it against the saw fence as if it were on the floor — that is, one flat side against the fence and one against the base of the saw. If you're cutting quarter-round to install on the ceiling, though, you need to change the orientation; one flat side is against the fence and the other is facing up. It's more difficult to hold the trim steady in this orientation, so don't be afraid to use clamps.
More Cutting and Measuring Tips
Walls in old buildings aren't always straight, so you can't just cut 45-degree angles and get a tight fit. You can use a variation of the 3-4-5 method and an online table to find the exact angle of the corner and set the blade angle to half of that. It's probably faster and easier, however, to use trial and error and cut multiple angles on a scrap piece of quarter-round until you find the right one.
Multiple situations arise in which you need a short piece with a straight end and an angled one. One of the most common is when a door is close to the corner of a room and you're fitting quarter-round for the baseboard. When using a power miter saw, the safest way to cut these short pieces is to cut the angle from a long piece first and then cut the other end square. That way, you never have to hold your hand dangerously close to the saw blade.