
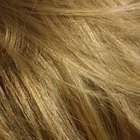
An I-Tip extension, known also as shoelace tip, Flash Point or cold fusion, is a pre-tipped variety of hair extension that uses a cold method to connect the piece. This process involves a hook or loop, micro tube and fusing pliers. The website Vision Hair Extensions (visionhairextensions.com) states this method works well for those who do not want to apply heat to their natural hair. The positioning procedure is straightforward but requires specific equipment purchased as part of a hair extension kit or individually.
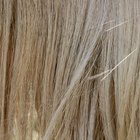
Part the hair into horizontal sections. Grasp the top layer of hair and pull upward. Secure this section of hair with a clip, giving access to the strands underneath. The lower section should begin where you wish to install the extension.
Insert the pulling needle or hook through the I-tip tube. The tube will sit on the lower portion of the needle, exposing the hooked end.
Grab a section of the hair where the first extension will attach. The section should be small enough to fit through the tube effortlessly.
Hook the needle onto the hair near the upper region of the strands, approximately one inch from the scalp.
Pull the needle toward you while securing the tube with your fingers. This will slide the section of hair through the tube.
Grasp the tube with your fingers, holding it in place approximately 1/2 to 1 inch from the scalp.
Push the extension upward into the tube. Set the solid or tipped end into the bottom of the tube. Push the extension up toward the scalp. The tube now holds a section of natural hair and the extension at the same time.
Use the hair extension pliers to flatten the bottom end of the tube, the end away from the scalp. This flattening process secures the extension, fusing it to the natural hair.
Related Articles
How to Adjust Bead Extensions
How to Take Beaded Hair Extensions Out ...
How to Tie Micro Braids at the End

How to Use VO5 Products

Step by Step Guide to Micro Loop Hair ...

How to Use Keratin Glue Stick Adhesive ...

How to Curl Medium Layered Hair

How to Keep Extensions From Falling Out

Removing Hair Extensions With Acetone
How to Curl Kanekalon
How to Remove Keratin Glue

How to Legally Change Your Name When ...

How to Pin Curl Short Hair

How to Use Remington Curlers

Synthetic Hair Vs. Kanekalon Hair
How to Put in a Drawstring Ponytail
How to Use a Volumizing Finger Diffuser

How to Apply a Texturizer to a Natural ...
How to Curl Hair With Foam Rollers

How to Glue in Tracks on Black Hair
References
Writer Bio
Writing since 1999, Darla Ferrara is an award-winning author who specializes in health, diet, fitness and computer technology. She has been published in "Mezzo Magazine" and Diet Spotlight, as well as various online magazines. Ferrara studied biology and emergency medical technology at the University of Nebraska and Southeast Community College.
Photo Credits
long female hair image by Leticia Wilson from Fotolia.com