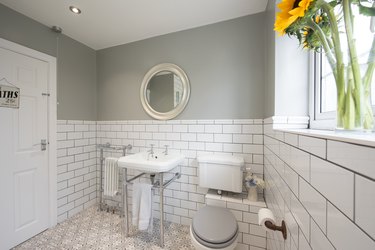
It's been said that the toilet is among the most important fixtures in your home and for good reason. Toilets certainly work hard, and they may start to exhibit signs of wear over time. Hard water, mold, mildew and cleaning products can stain the inside of the toilet bowl, yielding an unsightly appearance that you might wish to repair. Small cracks or imperfections in the porcelain can also be fixed if you know what you are doing.
Important Safety Considerations
Video of the Day
Before you proceed with a toilet repair of any kind, you'll want to empty the bowl of water and clean it thoroughly with an approved bathroom cleaner. Turn the water off at the source to ensure the toilet does not refill once emptied. Wearing disposable rubber gloves, use a bucket to drain the toilet into a utility sink or outside. Then, thoroughly clean the toilet and dispose of your gloves.
Video of the Day
If you have a bathroom exhaust fan, turn it on to remove the cleaner's fumes from the air. Opening a window is also a good idea. This is particularly important if you will be using a toilet refinishing kit, which may have chemicals that are harmful for you to breathe.
Getting Started With the Repair
Before you begin to refinish your toilet, consider whether it is a candidate for repair. DEA Bath explains that while cracks in porcelain no longer mean the end of the fixture, some damage probably shouldn't be fixed. If you see blue veining on the outside of your toilet tank, for instance, this probably indicates porcelain crazing stained with residue from cleaning products. These fissures can't just be refinished, as water will continue to sweat (or even leak more quickly) from the toilet bowl.
Similarly, crackling on your toilet cannot be repaired. This sort of pattern may be due to the inclusion of concrete in the bowl material, which is common in older toilets. As concrete dries out over time, it shrinks, leading to crackle marks. Simply refinishing the toilet will not fix this problem, as the concrete will continue to shrink, making your refinished surface look even worse.
Once you have determined that it's okay to move forward with the repair, you will need a refinishing kit. These are available for purchase at many home improvement or hardware stores. HGTV explains that these kits aren't technically glazing your toilet since that can only occur during the original process when the porcelain is fired.
Using a Refinishing Kit
Since the kits are designed for tub and tile in most cases, you can use a refinishing kit on your toilet. You should wear gloves, goggles and a mask or respirator during this process as well as keep any windows open and exhaust fans on.
Repair any minor dents or scratches using the bonding agent in your repair kit. Once it has dried, you will need to sand the bonding agent down until it is flush with the bowl surface. When you are satisfied with the look of the toilet, you can move on to the finish.
Apply the refinishing topcoat from your kit according to package instructions and allow it to dry thoroughly. Once it has dried, consider the appearance of the toilet. If you would prefer it to have a darker or deeper look, add more coats of the finishing glaze until you are satisfied. Allow each coat to dry thoroughly in between applications. Then, buff and polish the toilet with a microfiber cloth or the buffing agent included in your refinishing kit, if applicable.