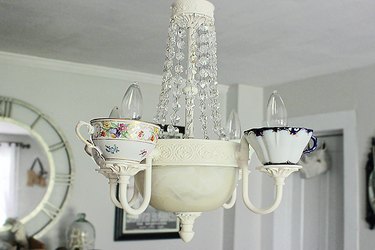
Combine sophisticated style and vintage elegance by transforming an ordinary light fixture into a charming teacup chandelier. Not only can you recycle your mismatched teacups, you can add luxurious lighting to your favorite indoor space.
Things You'll Need
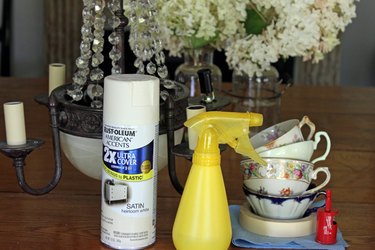
Chandelier (preferably with crystal accents)
Masking tape or painter's tape
Medium-grit sandpaper (optional)
Spray paint
Scrap piece of soft cloth larger than the diameter of the teacup
Teacups, 1 for each arm of the chandelier
1-inch Diamond ceramic hole saw
Spray bottle filled with cold water
Drill press or power drill
Lightbulbs, 1 for each electrical socket on the chandelier
Hot glue or super glue (optional)
Ceiling hook
Tip
- A drill press makes the drilling process easier and reduces the risk of breaking the teacups, but if you do not have one available, a handheld drill will also work. However, you may want to purchase extra teacups to practice drilling before you drill the teacups you want to use on the chandelier.
- Avoid using teacups with stems as they are much more difficult to drill through and usually crack during the drilling process. Choose teacups with a flat bottom if possible.
- Even the highest quality drill bits wear down quickly due to the extreme hardness of ceramic teacups. If you plan on drilling more than five teacups, you may need two drill bits.
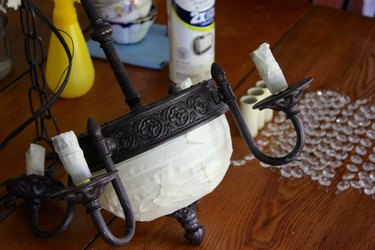
Step 1: Prepare the Chandelier for Painting
Remove all lightbulbs, socket covers and crystals, and set them aside. Use masking tape or painter's tape to cover any portions of the chandelier that do not need to be painted. Make sure to cover each light socket with tape to prevent paint from damaging the wiring in the chandelier.
Video of the Day
Tip
If the chandelier you are using has a shiny or metallic surface, you may want to lightly sand it with medium-grit sandpaper to help the paint adhere better.
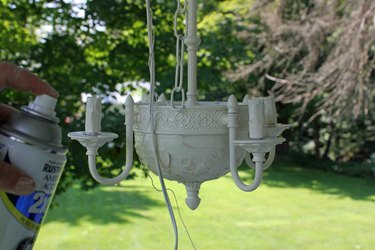
Step 2: Paint the Chandelier
In a well-ventilated room or outside, spray paint the chandelier in thin, light coats to prevent paint drips. If possible, hang the chandelier from a hook to make it easier to paint underneath it. Allow the paint to dry completely.
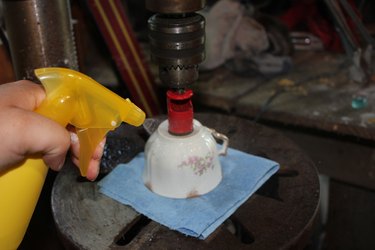
Step 3: Drill a Hole in the Teacups
Secure the drill bit in place and put a soft piece of cloth on top of the drilling surface to help prevent chips in the teacup. Place the teacup upside down on the cloth, centered directly below the drill bit. Spray the drill bit and teacup with ice cold water. The water acts as lubrication and cools the drill bit to prevent cracks.
Set the drill to the lowest speed possible and slowly lower the drill bit toward the teacup. Spray cold water on the cup and drill bit every 3 to 5 seconds to keep the teacup lubricated and the drill bit cool. Drill as slowly as possible to prevent the teacup from cracking or shattering. Even though teacups are very thin, the ceramic they are made of is very hard, and it will take 2 or 3 minutes to drill each teacup.
If the drill bit becomes hot at any point, pull the drill bit off the teacup and spray it with cold water until it has cooled down. If the drill bit overheats, it is more likely to crack the ceramic. You may want to ask a friend to help with spraying the water for you so you can focus on the drilling.
Warning
Wear eye protection and thick gloves while operating the drill to protect your eyes and hands in case a teacup shatters.
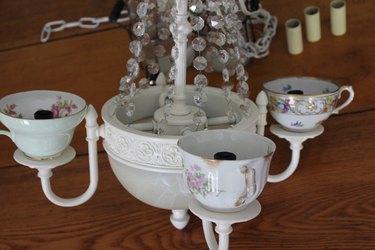
Step 4: Add Teacups to the Chandelier
Once the paint is dry, remove all of the tape on the chandelier and put the crystals back in place. Gently slide the teacups over the electrical sockets and place the socket covers back on.
Tip
You can add a small amount of hot glue or super glue to the bottom of the teacups before placing them over the sockets if you want to permanently secure them to the chandelier.
Step 5: Add the Lightbulbs
Now that your teacups are in place, screw a lightbulb into each socket on the chandelier.

Step 6: Hang the Chandelier
Turn off the electricity to your home and attach the chandelier's electrical wiring in the ceiling outlet. Hang the chandelier on a sturdy ceiling hook, turn the electricity back on, and enjoy the elegant charm of your new teacup chandelier.

Video of the Day