When you decide to erase your computer's hard drive, you have two choices: Formatting the hard drive or completely wiping it. Each works differently and has different applications, and each process offers different levels of data security. The only alternative with complete security is to physically destroy your hard drive — which is obviously not always a viable solution.
Format vs. Wipe
Video of the Day
Formatting a computer refers to a process that removes all data from the hard drive, but doesn't completely destroy it. Instead, it erases references to the data's location on hard drive so the computer can't find it. A data recovery specialist can still find some, if not all, of this data. Wiping a hard drive not only deletes the references but writes over the data itself, effectively eliminating it from the hard drive. Wiping the hard drive is therefore generally more secure than just formatting it.
Video of the Day
When to Format
The best time to format your computer is when you have plans to continue to use it later: For example, if you have to restore your computer to factory defaults to clear up a technical issue, or to quickly clear off the data.
When to Wipe
Wiping the hard drive is the best choice if you're going to sell, give away, donate or recycle your computer — especially if you kept personal or sensitive information on the hard drive. Since wiping the drive completely eliminates your data, this minimizes the risk of someone getting hold of your personal information and using it illicitly.
How to Format Your Computer
Formatting your computer is essentially the same thing as resetting it to factory defaults. How you perform this task depends on your computer's recovery system. Most computers feature a recovery partition on the hard drive, which contains re-installation information for Windows. In some cases, you may need to use a recovery drive or DVD in order to reset your computer. Windows 8 computers have a built-in recovery interface with an option for resetting your computer to factory defaults.
If you're using Windows 7, you need a copy of your Windows installation data on a DVD or USB drive. Boot from the disc/drive and run the installation process to overwrite your Windows 7 installation.
Resetting Your Computer Through Windows
Step 1
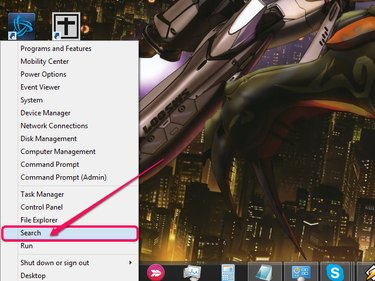
Press Windows-X on your keyboard and select Search.
Step 2
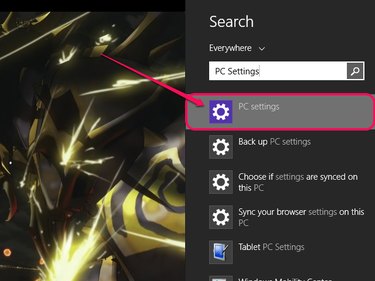
Type PC Settings in the search field and select the PC Settings icon.
Step 3
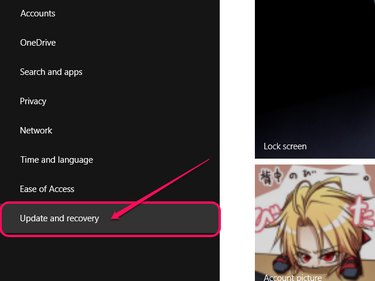
Select Update and Recovery from the menu.
Step 4
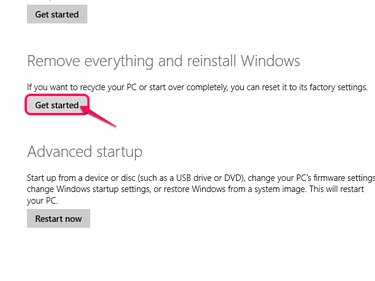
Select Recovery, then click Get Started under the Remove Everything and Reinstall Windows heading. Follow the on-screen prompts and choose whether to erase your data quickly or thoroughly. The quicker option is less secure, but takes less time.
How to Wipe Your Computer
To completely wipe your computer's hard drive without physically destroying it, you need some specialized software. Programs like Darik's Boot and Nuke (DBAN), Active@ KillDisk and Disk Wipe are all free wiping programs that completely eliminate any data on your hard drive. Active@ Killdisk Pro and WipeDrive are two paid options with more security features. Since each program works differently, consult the documentation for the program you choose.