
Kitchen faucets have become streamlined and a bit more complicated over the years, but faucet repair is still fairly straightforward. In the past, a plumber only needed to know how to fix a compression spout, but modern versions can have one of three other valve mechanisms that were developed around the middle of the 20th century. The repair procedure for each is different, but none is particularly difficult. In fact, any knowledgeable homeowner with the proper tools and a modicum of plumbing expertise can handle the DIY job.
What Exactly Needs Fixing?
Video of the Day
When you have a leaky faucet that either drips from the spout or spews water from the handle, you can usually trace the problem to the valve. As plumber Mike Diamond points out, the three available types of faucets — not including compression spouts, which aren't that common anymore — feature either a cartridge, ceramic disk, or ball valve.
Video of the Day
If the valve isn't at fault, the problem is usually due to the rubber gaskets and O-rings. All these parts, including the valve, are replaceable. For most kitchen faucets, they are easy to find.
A malfunctioning faucet can also cause poor water flow. This typically happens because hard-water deposits are blocking the aerator, the water-supply ports inside the valve, or the valve housing. It's easy to clean the aerator, and you can usually clean the valve, but sometimes, you need to replace part or all of the valve.
A leaky spout can also spray water into the sink cabinet and cause lasting damage. When this happens, the problem is usually caused by a loose connection on the faucet hose or the hoses that connect the spout to the handles or the sprayer. Although it entails working in a cramped space with little light, an under-cabinet leak is usually easy to locate and fix. The following steps and list of supplies will help you proceed with confidence.
Faucet Repair Tools and Supplies
The exact supplies will depend on the repair and type of faucet you're dealing with, but on most occasions, these items will get the job done.
Things You'll Need
Phillips screwdriver
Locking pliers
Hex wrenches (the most common size needed is 1/8 inch)
Flathead screwdriver
Needle-nose pliers
Plumbing tape
Plain, white distilled vinegar (for cleaning)
Spare O-rings, gaskets, and rubber parts
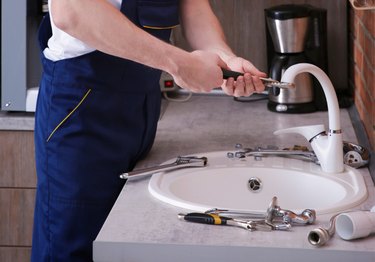
How to Repair a Leaky or Clogged Faucet
Step 1: Identify your faucet.
It's easy to overlook this crucial step until you get to the hardware store and find out that faucets are like cars when it comes to buying parts and repair kits. You need to know the make and model. Every brand has its own distinctive logo, which can usually be found on the faucet handle. After locating that, you can look up the model along with specific repair instructions and a list of recommended replacement parts. You can order those online from the manufacturer or a third-party supplier.
Specific manufacturers are known for making specific types of faucets. For instance, if you have a ball-valve kitchen or bathroom faucet, it's probably a Delta, and if you have a Euro-style one with squared-off edges, it's more likely to be a Grohe or Kohler than a Moen, Delta, Pfister, or American Standard.
Step 2: Clean the aerator.
A clogged aerator is the most common cause of reduced water flow. Unscrew the aerator, and backflush it under the tap or soak it overnight in a bowl of vinegar to descale it if necessary. If the aerator is recessed and you can't grip it with pliers, you may need to purchase an inexpensive aerator key from a plumbing supply outlet.
The aerator for pull-down and pull-out faucets is usually located behind the spray head. Unscrew that nozzle, and pull out the bit from the head or the hose. Then clean it with needle-nose pliers
Step 3: Turn off the water.
The shut-off valves are usually located under the sink, and you turn them off by rotating them clockwise. If you can't find shut-off valves, you may have to disconnect the main water valve for the house. When you need to make a repair to the hot side of a two-handle faucet, you can shut off the supply outlet at the water heater instead.
You don't have to turn off the water for some repairs, such as cleaning the aerator or replacing the handle.
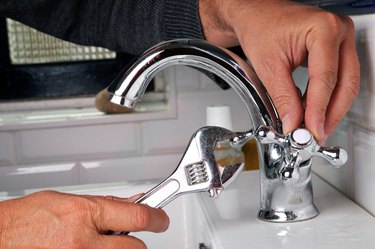
Step 4: Disassemble the faucet.
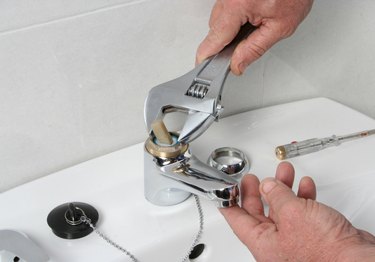
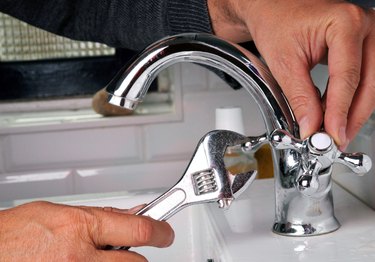
Begin disassembly by removing the handle. To do this, you have to locate the set screw. It may be on the base of the handle, under the lever, or hidden behind a cap that must be pried off with a flathead screwdriver. You can remove most set screws with a 1/8-inch hex wrench. If you don't see a set screw and the handle has a large tapered base, try unscrewing the base.
Once you've pulled off the handle, the rest of the disassembly depends on the faucet. It usually involves unscrewing a retaining nut with locking pliers. If you're servicing a ball-valve bathroom or kitchen sink faucet, you have to unscrew a dome-shaped collar to access the valve. Remove it slowly to avoid dropping any small parts down the drain. It's also a good idea to cover the drain entirely.
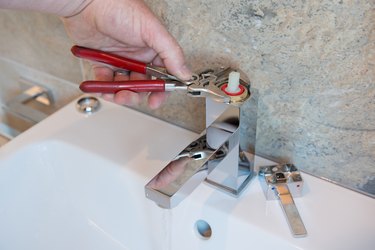
Step 5: Service the valve.
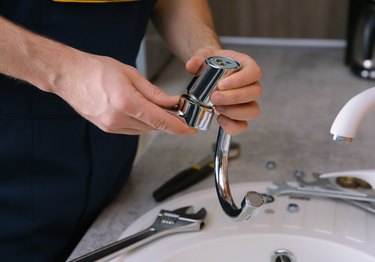
Once you've exposed the valve, you should be able to remove it by gripping the stem with pliers and pulling. Ball valves come out very easily (with no need for pliers), but cartridge, disk, and compression valves can get stuck by scale. If you can't get the valve out by wiggling, pulling, and dousing with vinegar, you may need to buy a valve puller, which works like a corkscrew.
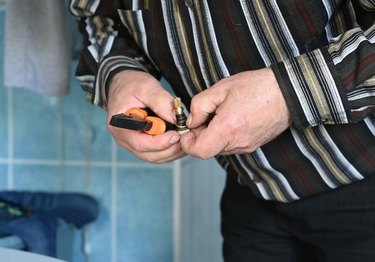
Once you have the cartridge, disk, compression, or ball valve, inspect it for cracks and other defects that could cause leaks. Replace it if you find any. Pull out all the rubber parts and springs from the valve housing, and replace them using new parts from a repair kit. If there's faucet buildup, soak the valve overnight in vinegar and scrape the scale using a screwdriver.
Step 6: Reassemble the faucet.
Reverse the disassembly procedure to put the faucet back together. Check the valve for marks indicating the proper orientation, and make sure they line up with the ones on the valve housing. Tighten everything securely with locking pliers, but try not to overdo it. You don't want to crack anything, and you want to be able to disassemble the faucet again in the future.
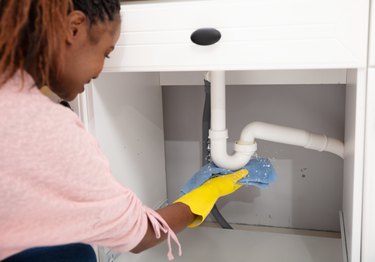
Step 7: Stop under-cabinet leaks.
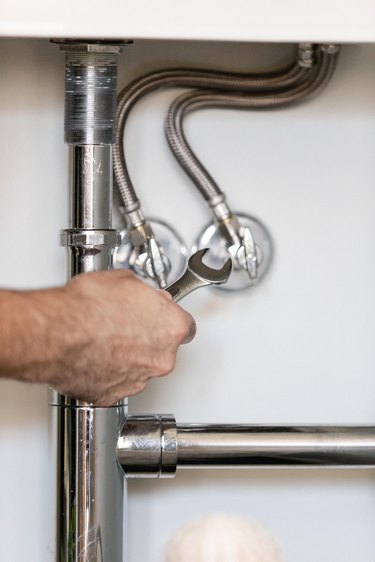
Clear off the cabinet shelves and look for drips. If a leak is coming from a hose connection with compression fittings, tighten everything with locking pliers.
If the hose has quick-disconnect fittings, they will be plastic, and you'll see a tab or button you can press. These leaks mostly occur because the parts weren't connected properly in the first place. To rectify that, turn off the water and drain the faucet. Then, grasp the fitting with both hands, push the tab or button, pull it apart, and push it back together until it clicks.
How much does it cost to repair a faucet?
The cost of repairing a faucet will depend on the root of the problem, but you can typically keep costs to a minimum by getting handy with your toolbox.
If the faucet leak is external, you may just need to tighten up connections or replace a feed line. If it's internal, the tap may need to be rebuilt or entirely replaced.
According to Porch, repair materials will cost around $26.74 per faucet. If you were to hire a professional, the total price for labor and materials would be about $250 on average. HomeAdvisor notes that location, job size, working conditions, and finish options can cause this amount to fluctuate.