The honeycomb lattice stitch is a single crochet background with a series of strategically placed front-post triple (or treble) crochet stitches worked across the surface to form a lattice, a series of connecting Xs. The fabric is dense with little drape and works well for a pillow, basket or purse. Use it as an accent on a jacket or afghan.
Things You Will Need
Video of the Day

Yarn Crochet hook of appropriate size for yarn (Worsted weight acrylic and and an F hook were used for this swatch.) Tapestry needle Scissors
Video of the Day
Start with a 22-stitch gauge/practice swatch.
Foundation Row
Chain multiples of five to desired width, plus two more. Turn. Single crochet in the second chain from the hook and every one across. Chain one at the end, turn and work two more rows in single crochet. Total three rows.
Begin To Work Lattice Foundation Row
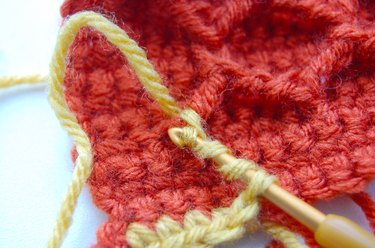
Row 4: Single crochet in the next three stitches. Yarn over the hook twice, insert the hook from front to back around the post of the second single crochet in the first row. Pull the stitch through. Four loops on the hook.
Yarn over and draw through two loops on the hook, yarn over and draw through two more loops on the hook until two loops remain on the hook.
Finishing the Other Half of the Lattice Foundation
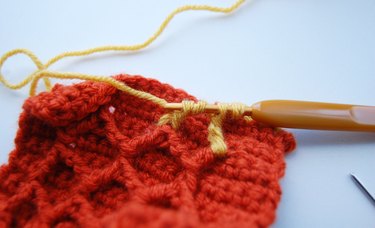
You are still on row four, setting up the lattice foundation. +Yarn over twice and insert the hook from front to back around the post of the seventh single crochet in the first row. Pull the yarn through. Four loops on the hook.
Yarn over and draw through two loops on hook, yarn over and draw through two more loops on hook, yarn over and draw through the remaining two loops on the hook. Skip one single crochet, the fourth stitch of row three, and then single crochet in the next four stitches.
Yarn over twice and insert the hook from the front to the back around the post of the seventh single crochet in the first row. Yarn over and draw through two loops on the hook, and then yarn over and draw through two more loops on the hook until only two loops remain on the hook.
Yarn over twice and insert the hook in the 12th single crochet in the same row as the previous insert. Pull the yarn through the post. Yarn over and draw through two loops on the hook, yarn over and draw through two more loops on the hook, yarn over and draw through the remaining two loops on the hook.
Skip one single crochet and single crochet in the next four stitches.+
Repeat from + to + (inserting around the post of every five stitches) until the final three stitches, and work them with a single crochet in each. Chain one and turn.
Rows Five Through Eight
Single crochet in each stitch for three rows, always ending with a chain one before turning.
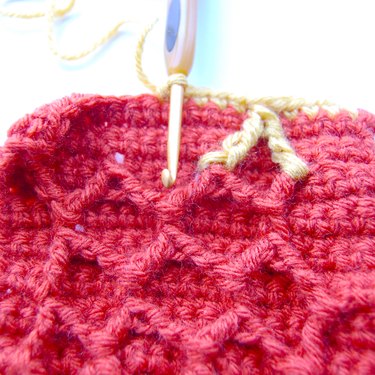
On row eight, +yarn over the hook twice and insert the hook from left to right behind the first two front-post triple crochets. Pull the yarn through.
Yarn over and draw through two loops on the hook. Yarn over and draw through two more loops on hook. Yarn over and draw through the last two loops on the hook.
Skip one single crochet and single crochet until you are just above the middle of the diamond (three stitches). Work another set of front-post triple crochets as in the lattice foundation section.
When completed, skip the next single crochet and single crochet until you reach the middle of the next diamond +. Repeat from + to + .